Setup · Resolume Wire
Resolume Wire is a modular node-based patching environment to create effects, mixers and video generators for Resolume Arena & Avenue.
Wire supports both MIDI and OSC control, but as OSC is the more flexible of the two and can be used both locally and over a network, we'll walk through integrating OSC control from TouchOSC into your Wire project.
Enable OSC Input
Open the Wire preferences, switch to the OSC section on the left and enable the OSC Input.

Wire is now listening for incoming OSC messages at the IP Address and Incoming Port number displayed here.
Configure TouchOSC
Open TouchOSC and make sure that you are connected to the same network as the machine that is running Wire.
Open TouchOSC's OSC connection settings.
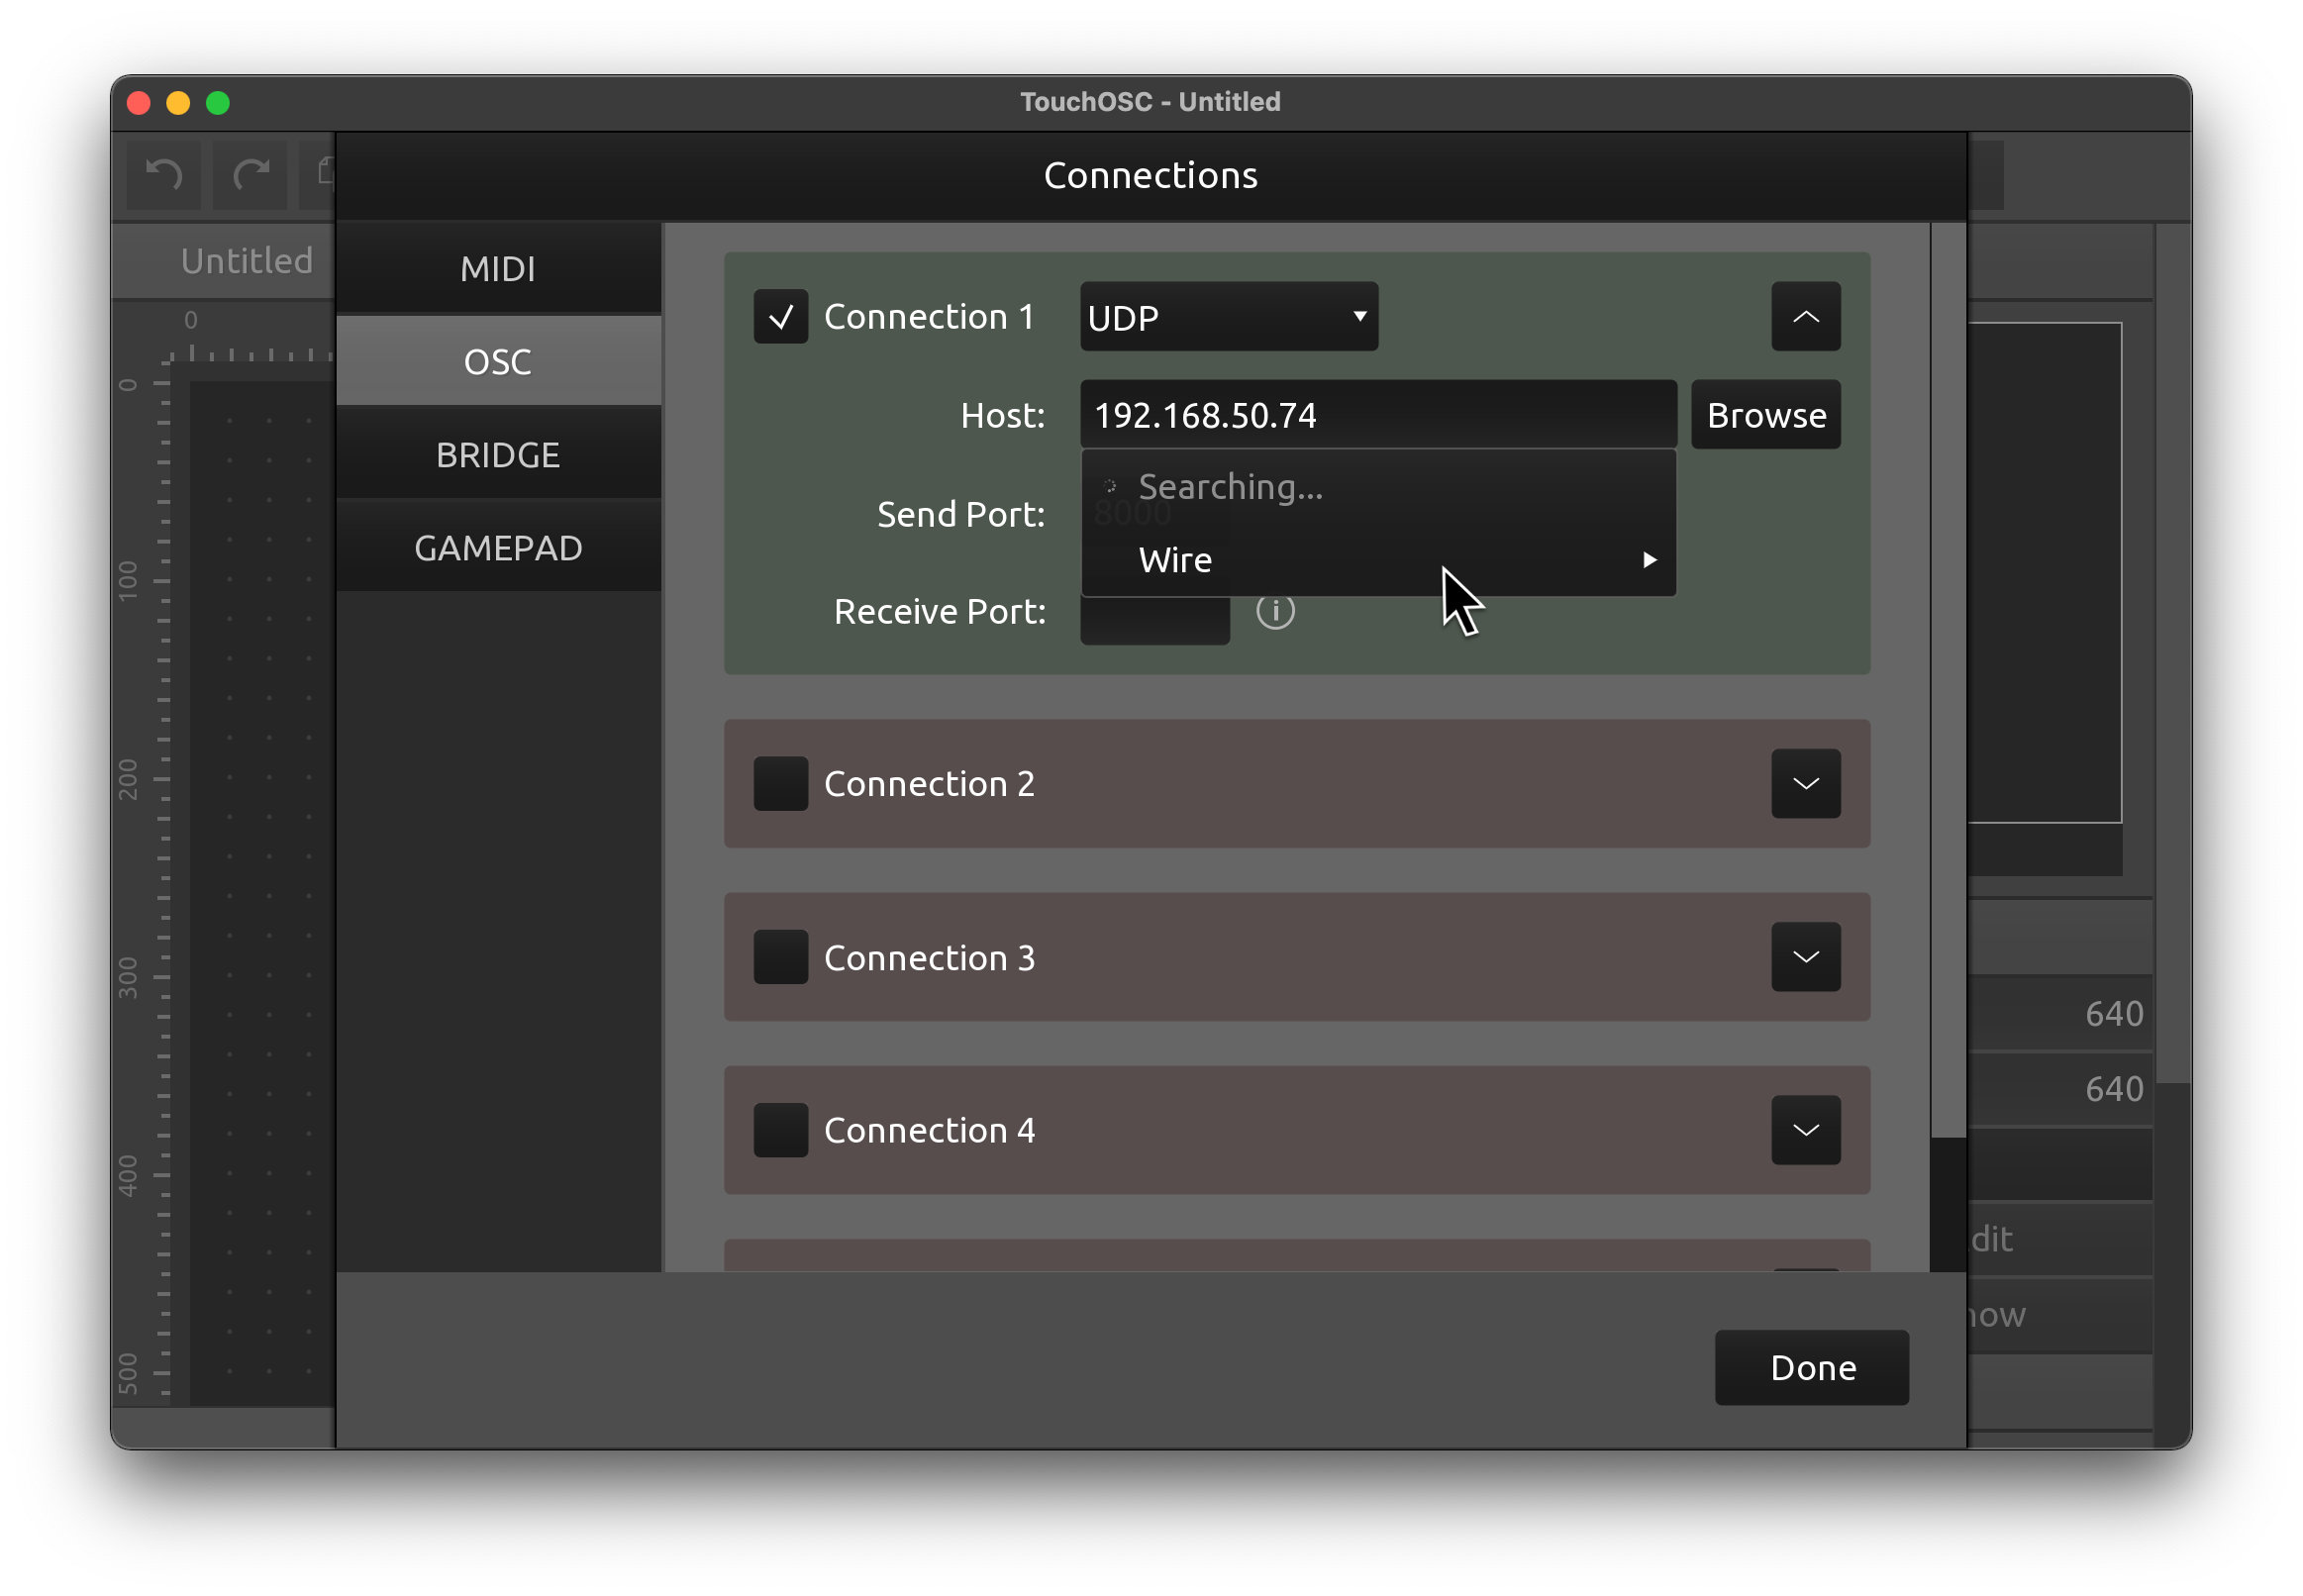
Make sure Connection 1 is enabled and set to type UDP.
Use the Browse button to search for and select Wire's OSC input on the network and fill in the required values automatically.
If the Wire receiver cannot be found, manually fill in the IP Address displayed in Wire's OSC preferences in the Host field, and the Incoming Port number into the Send Port field.
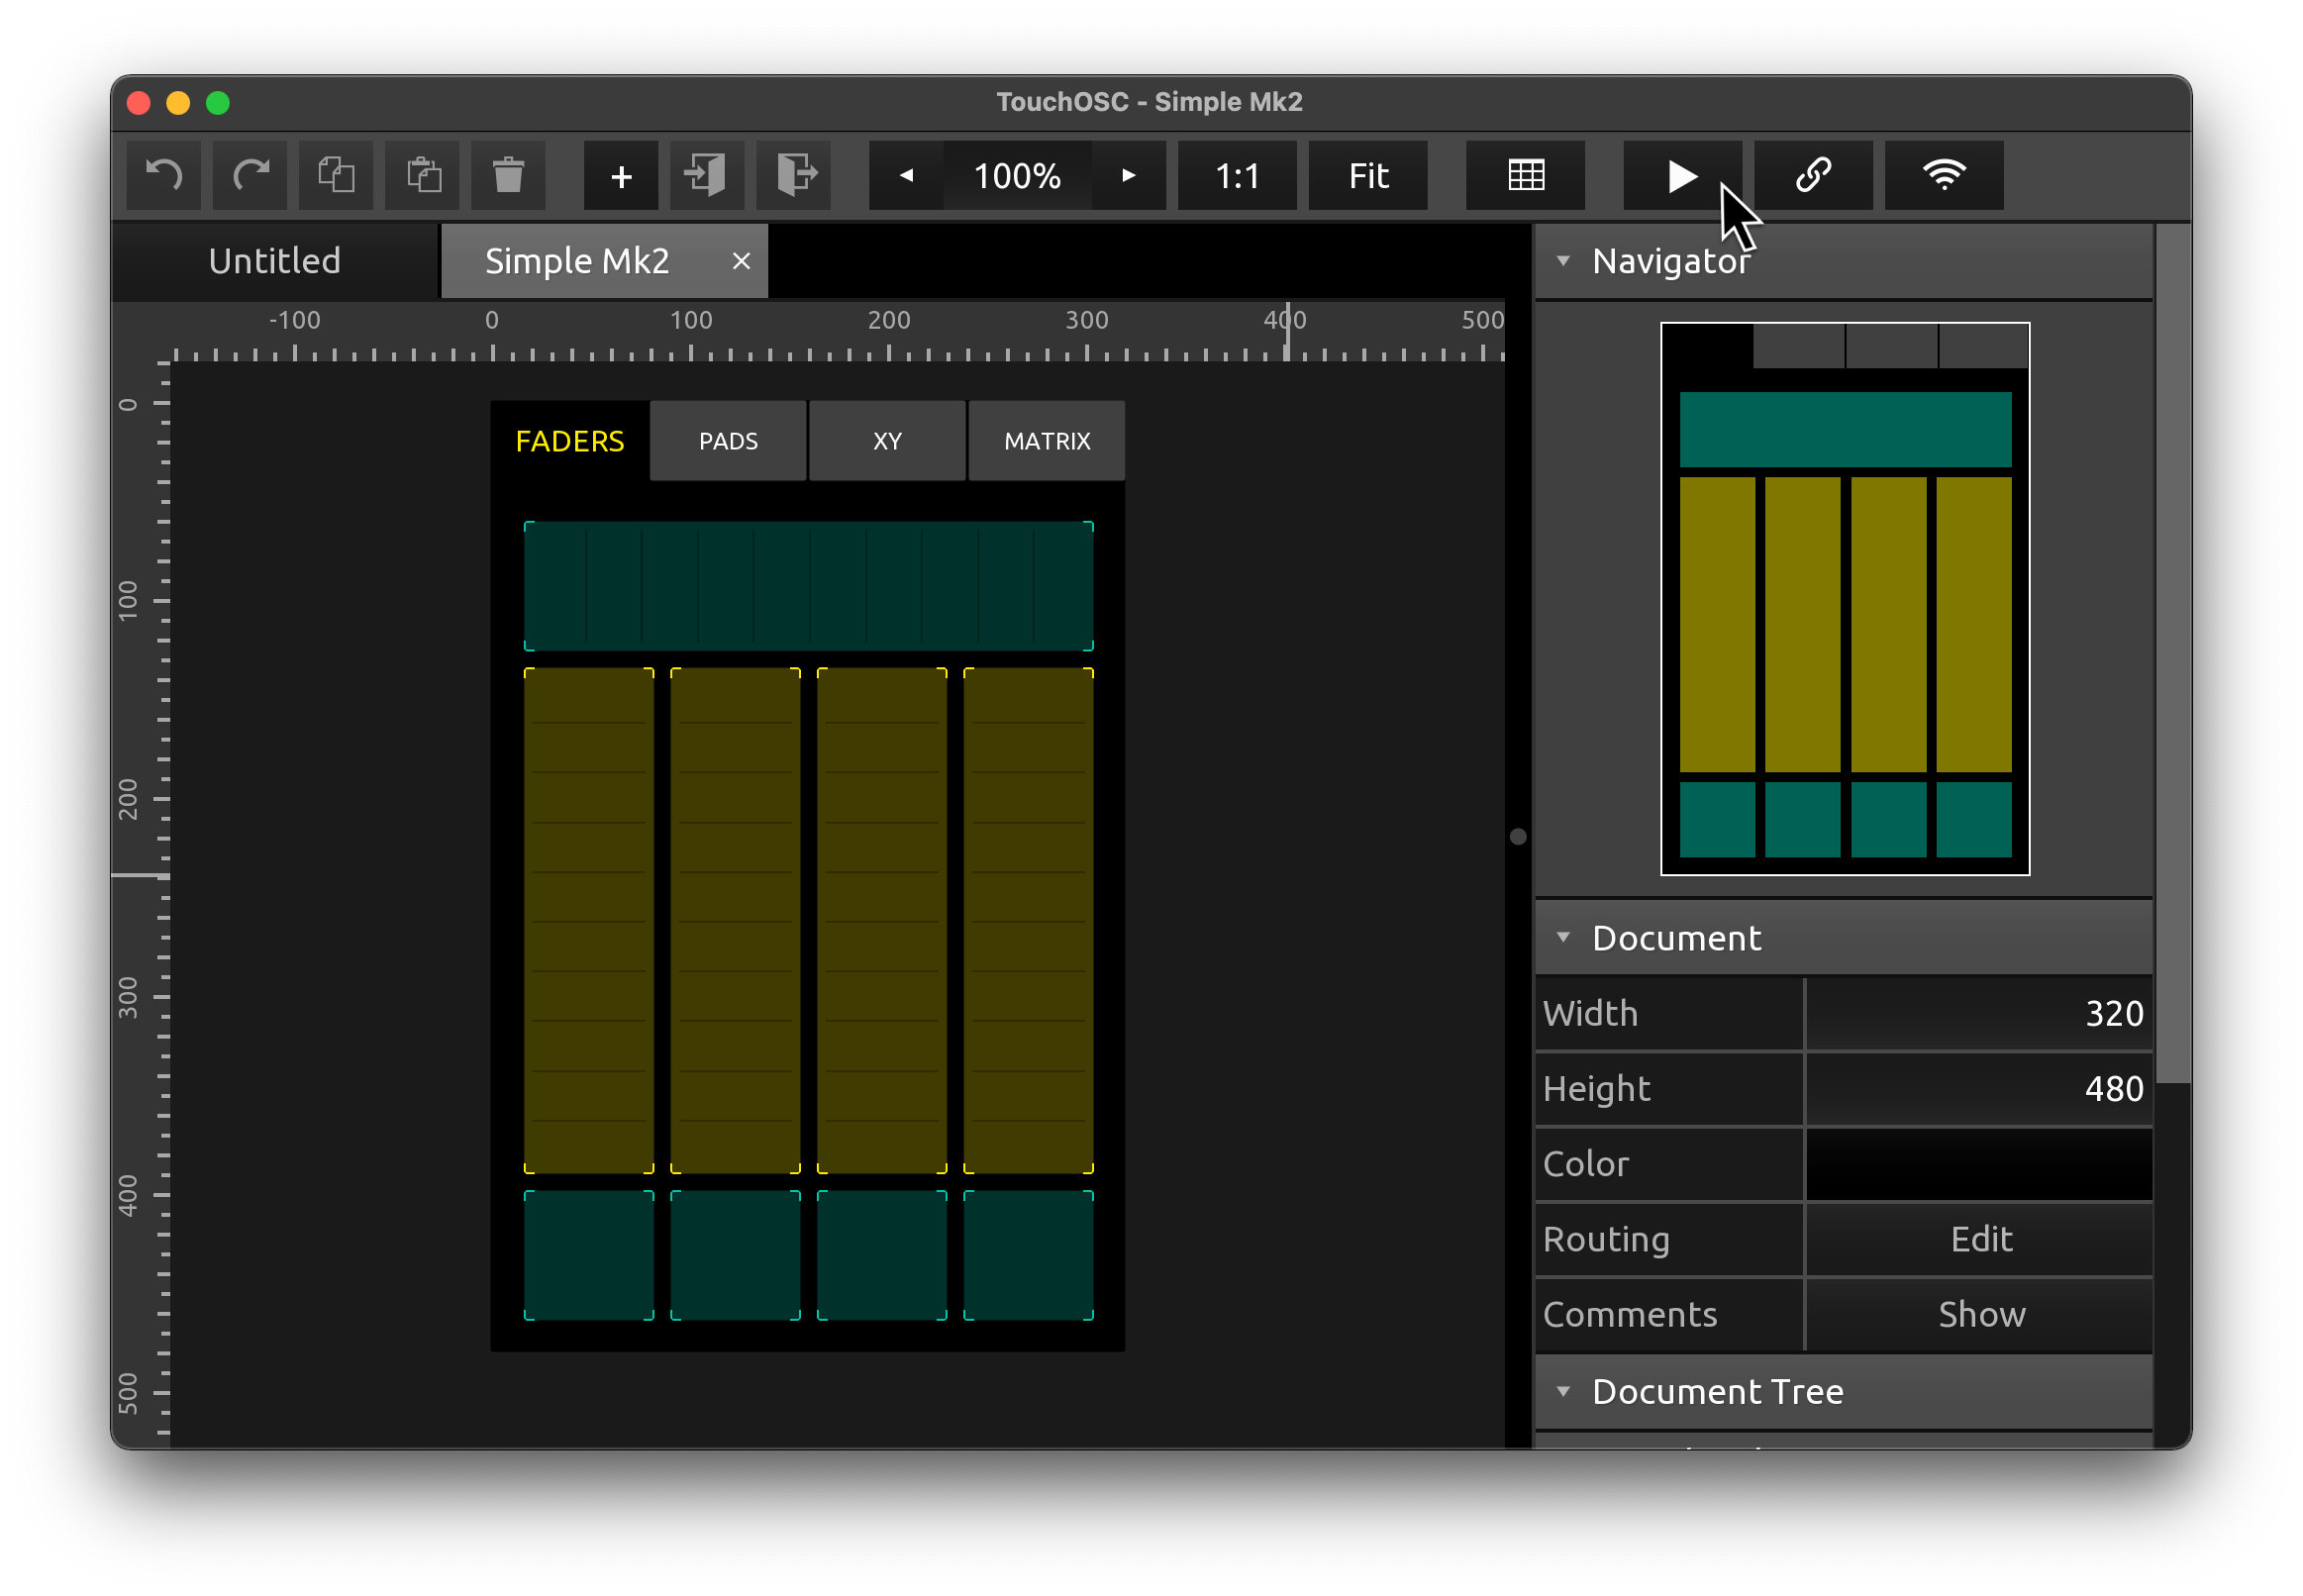
Close the dialog and open any document configured to send OSC messages, such as the included example layout Simple Mk2.
Switch to control surface mode using the Play button in the toolbar.
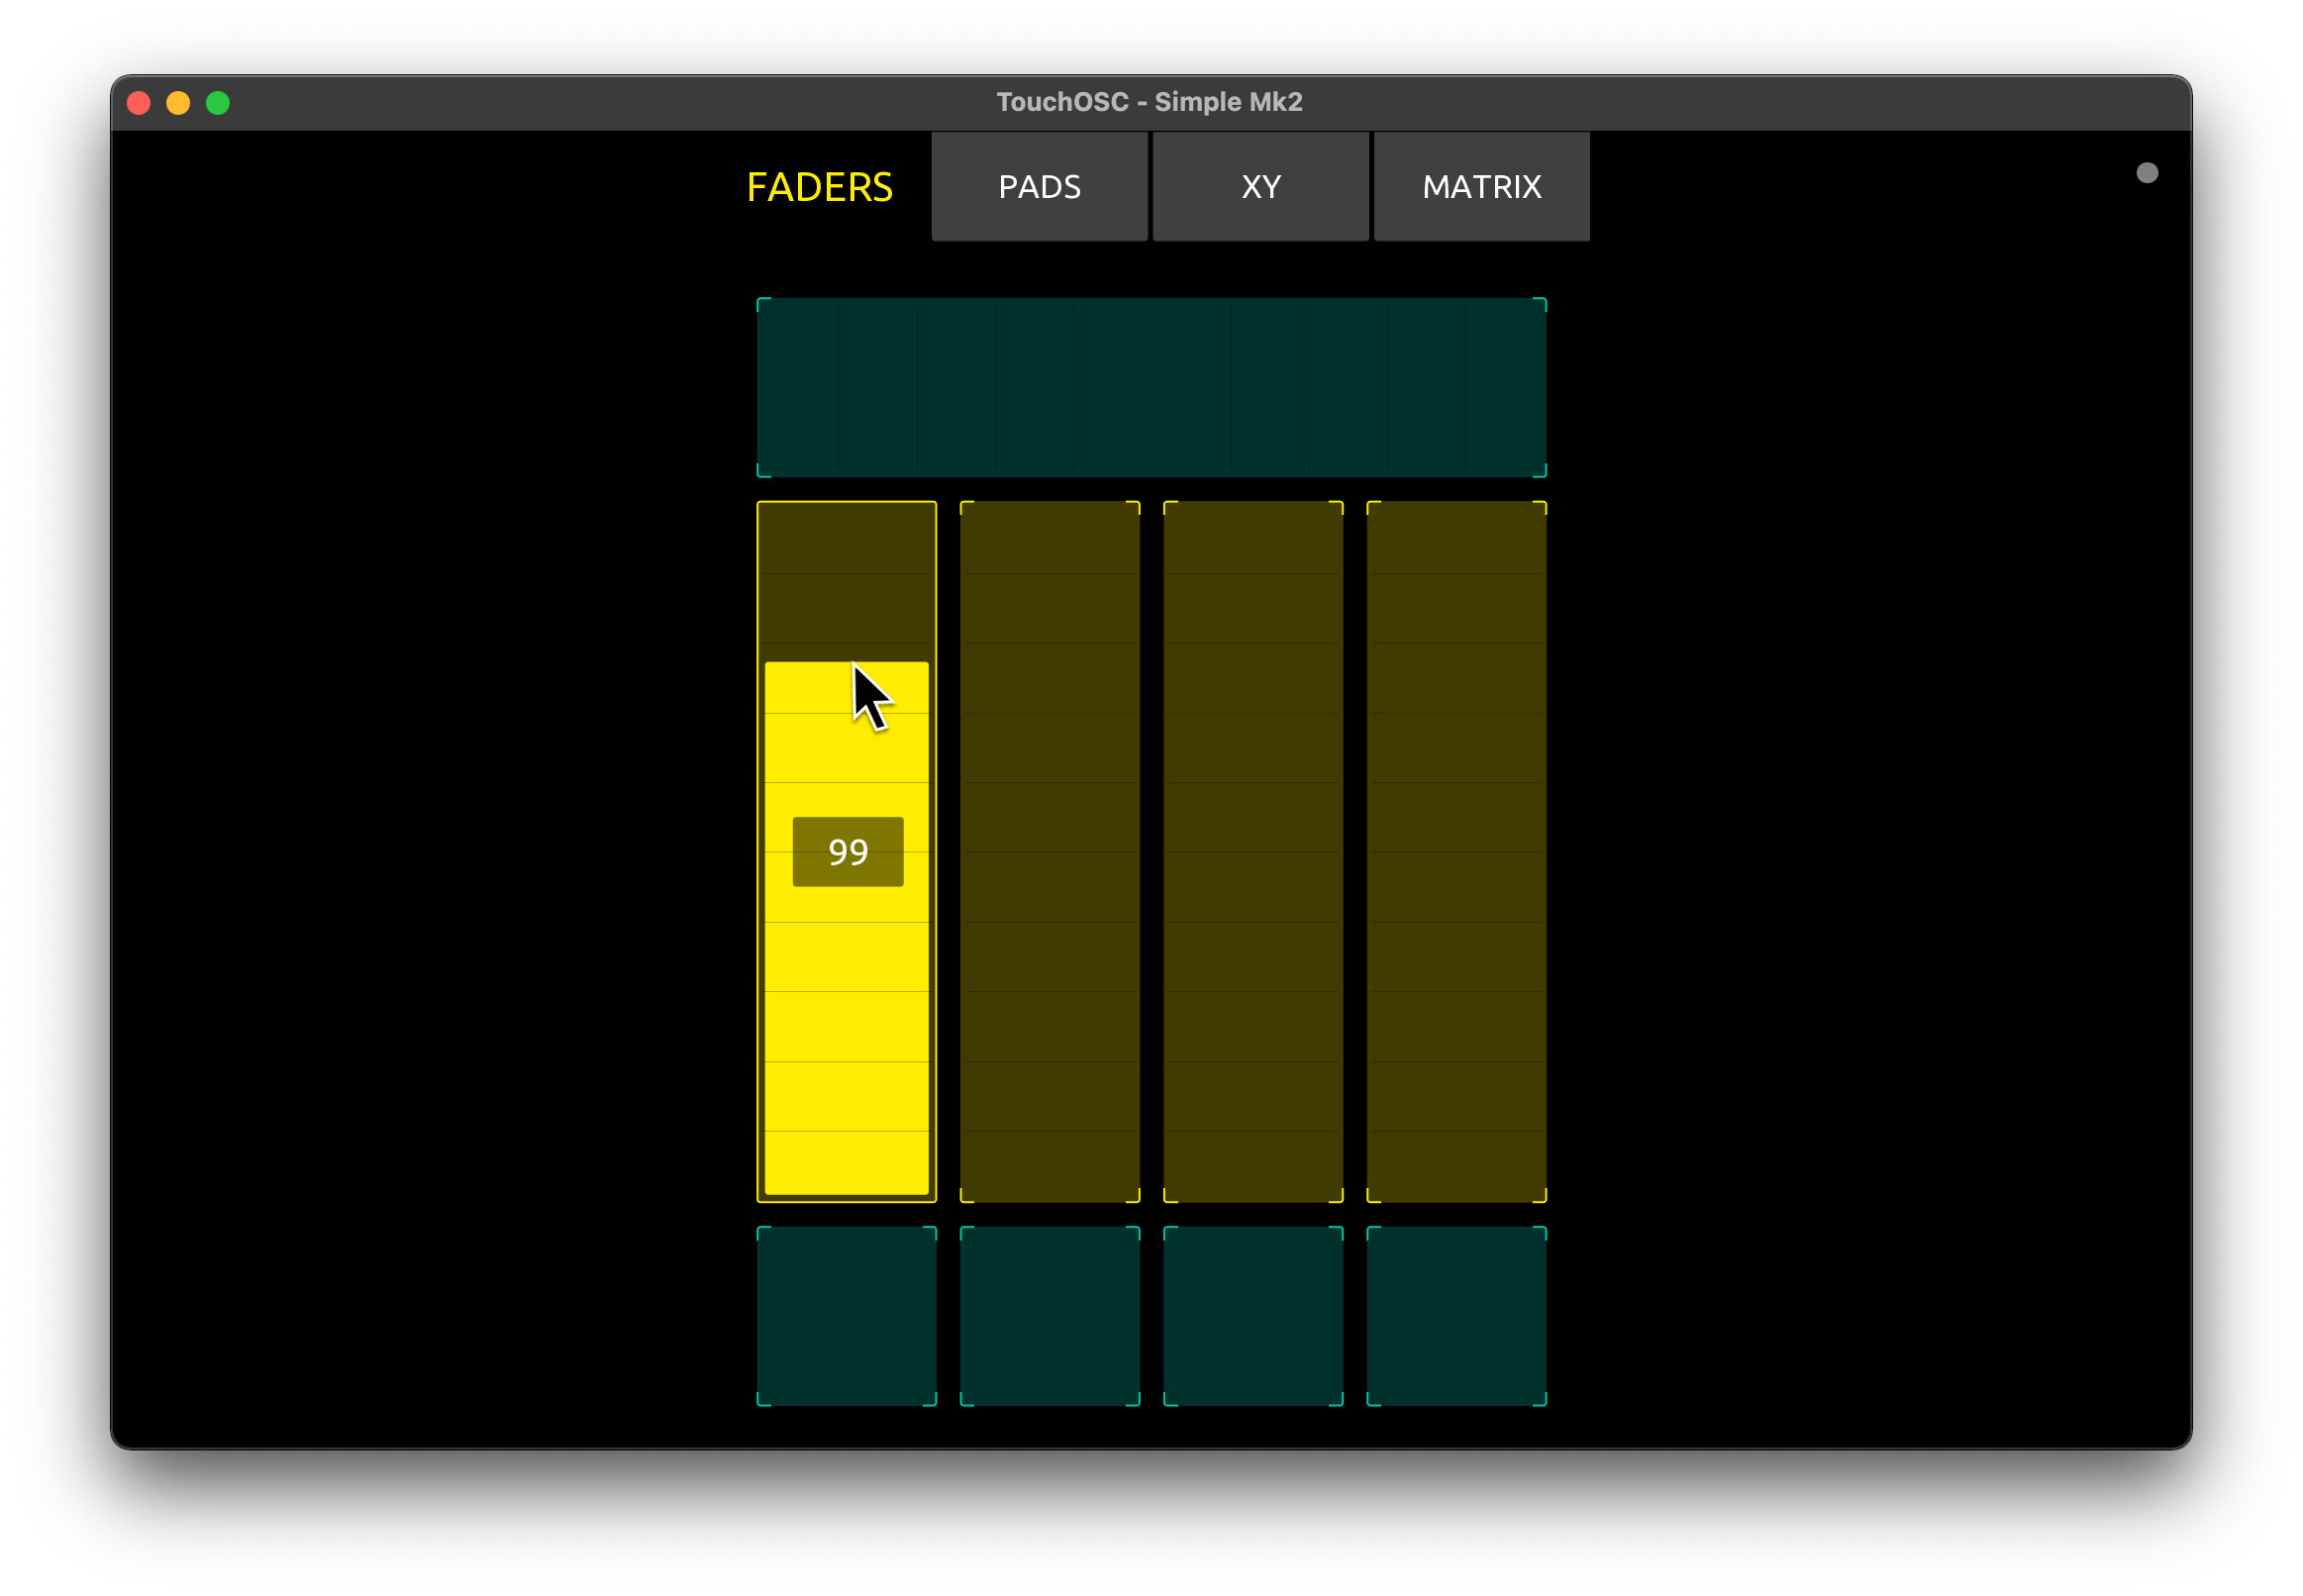
Send a few OSC messages from TouchOSC to Wire by using any of the controls in the layout.
In Wire, expand the OSC Input log by pressing the button with the arrow pointing to the right in the top right corner of the OSC preferences.
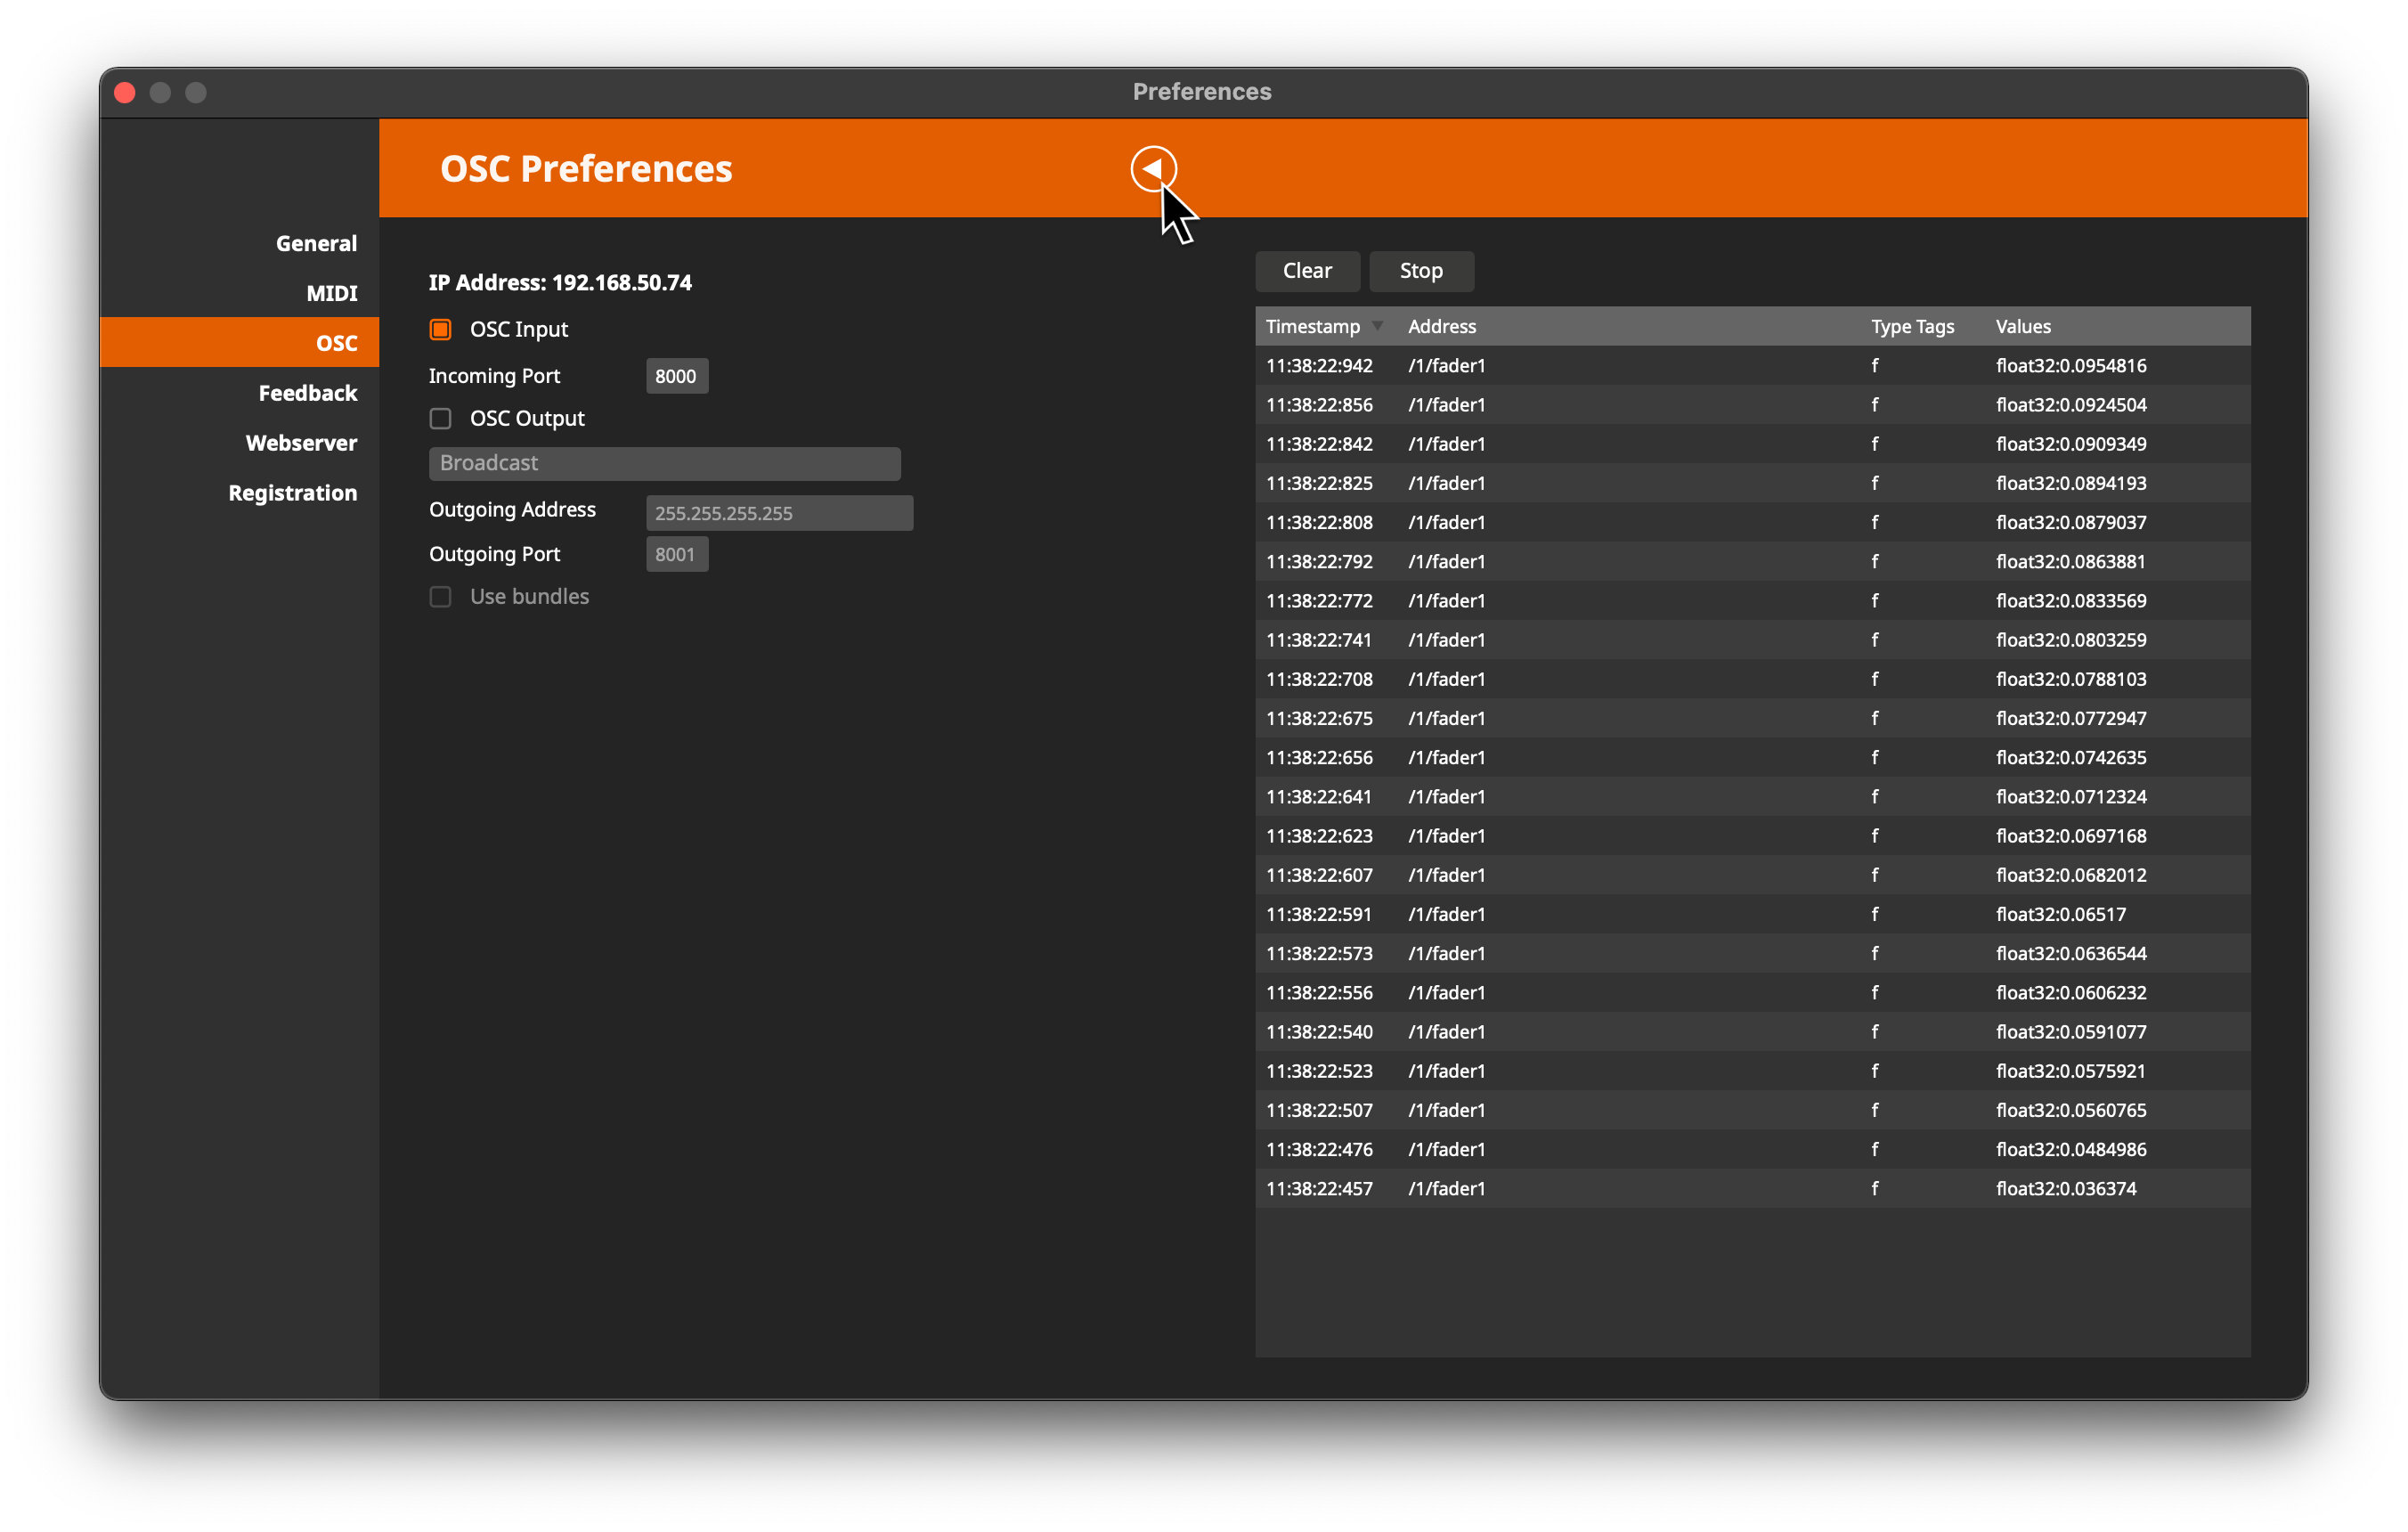
If everything is working, you should see the OSC messages sent from TouchOSC to Wire appear in the OSC Input log and the basic configuration is complete.
Create OSC nodes
Create a new Wire project and double-click on the empty project's background to open the node search window.
Enter OSC to filter all nodes related to OSC communication.

Select OSC In to create an OSC input node.

Open the node search window again and create a Read OSC node.

Connect the output of the OSC In node to the input of the Read OSC node.
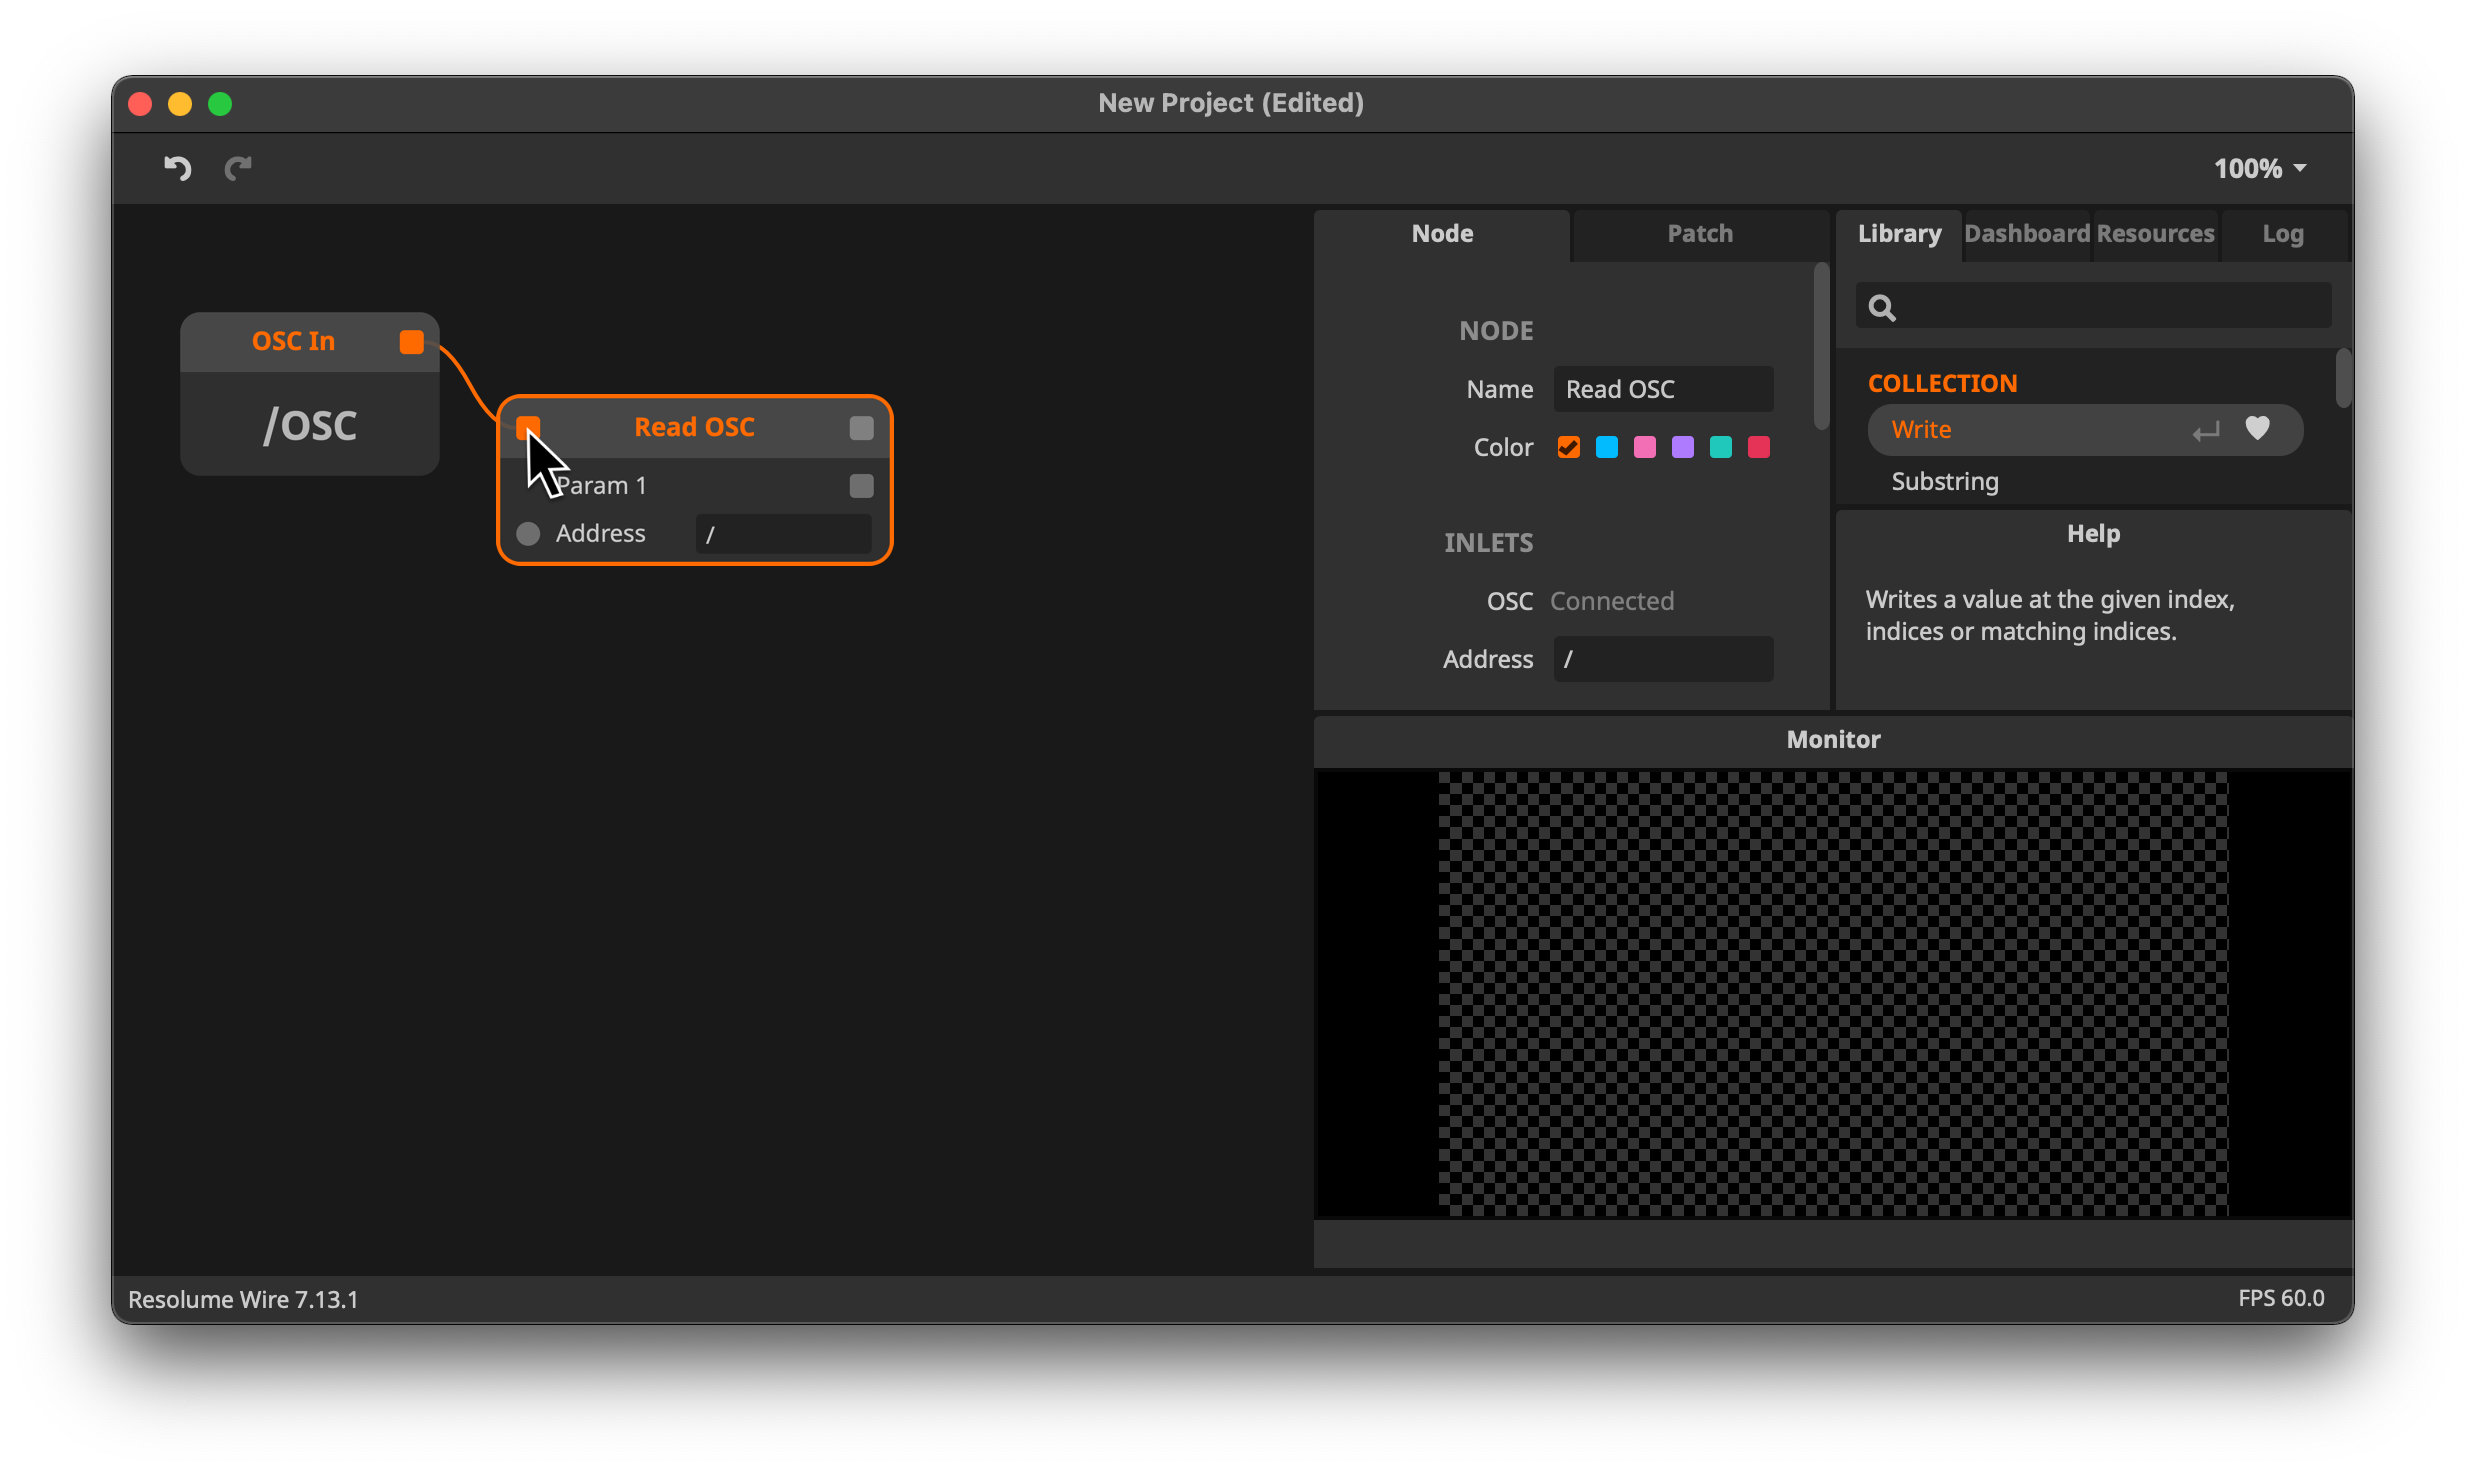
In the Read OSC node's Address field, enter the OSC address that you want to receive.
If you've opened the Simple Mk2 layout in the previous steps, enter /1/fader1.

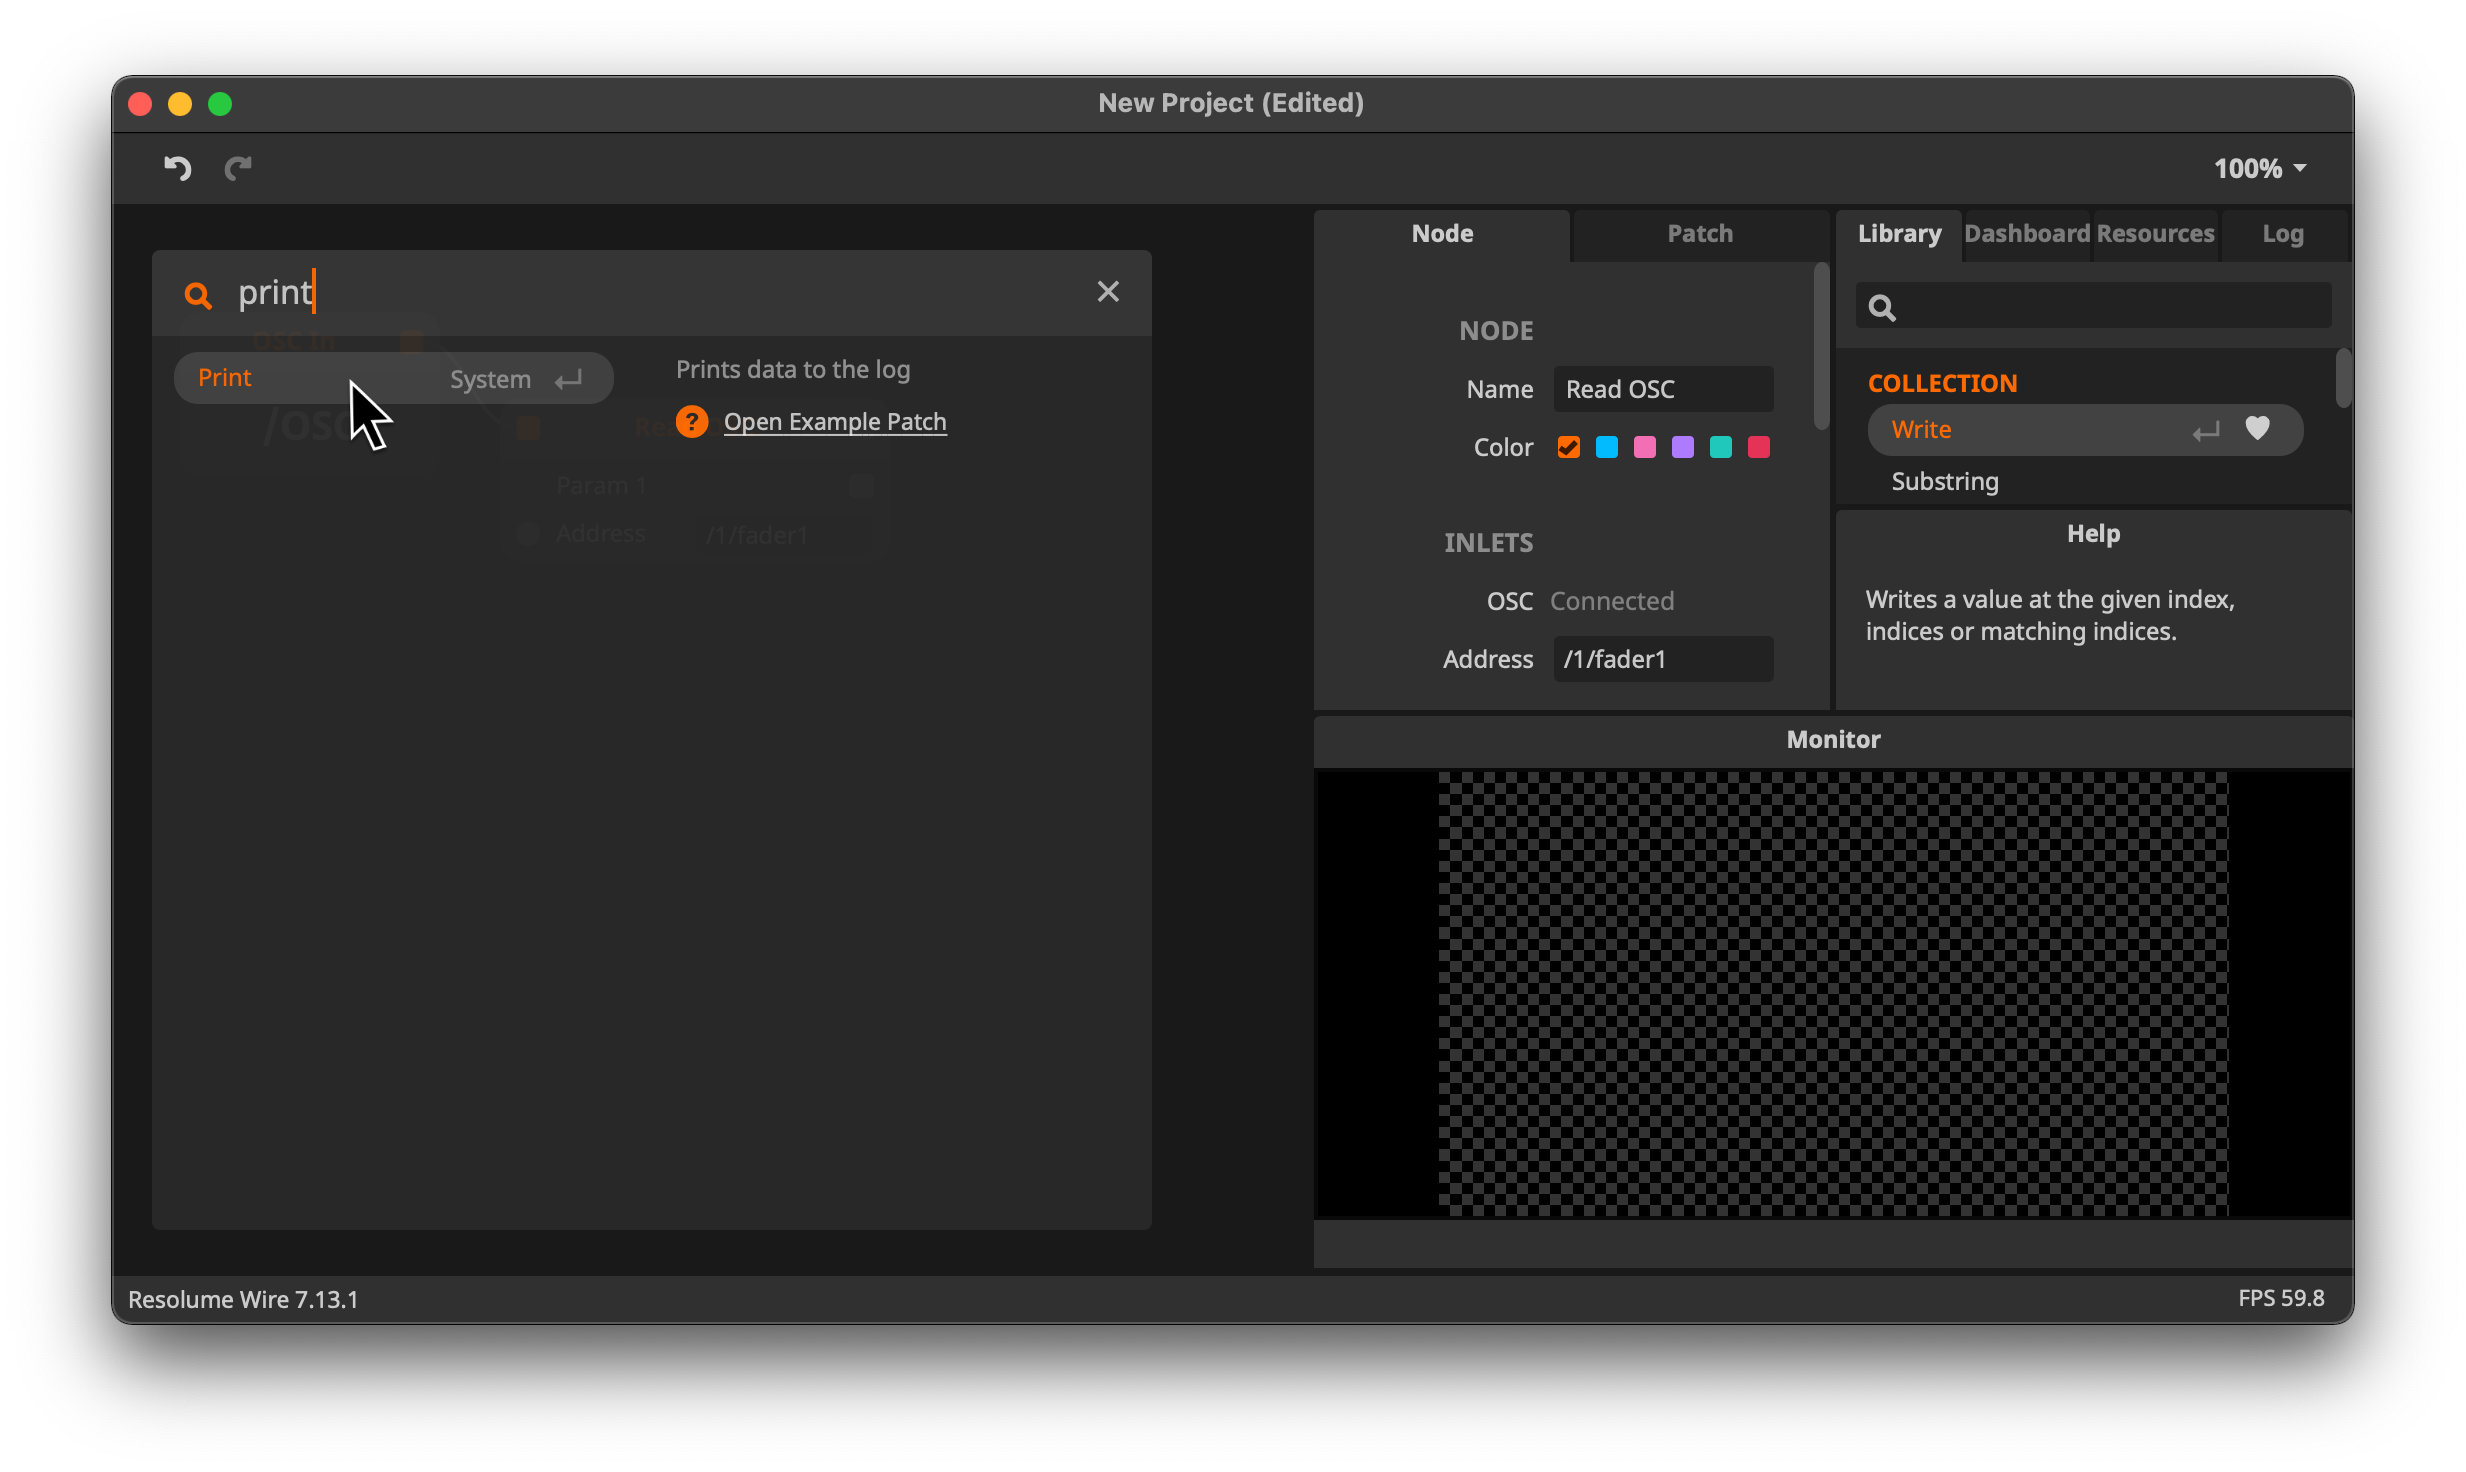
Open the node search window once again, search for print and create a Print node.
Connect the Param 1 output of the Read OSC node to the input of the Print node.
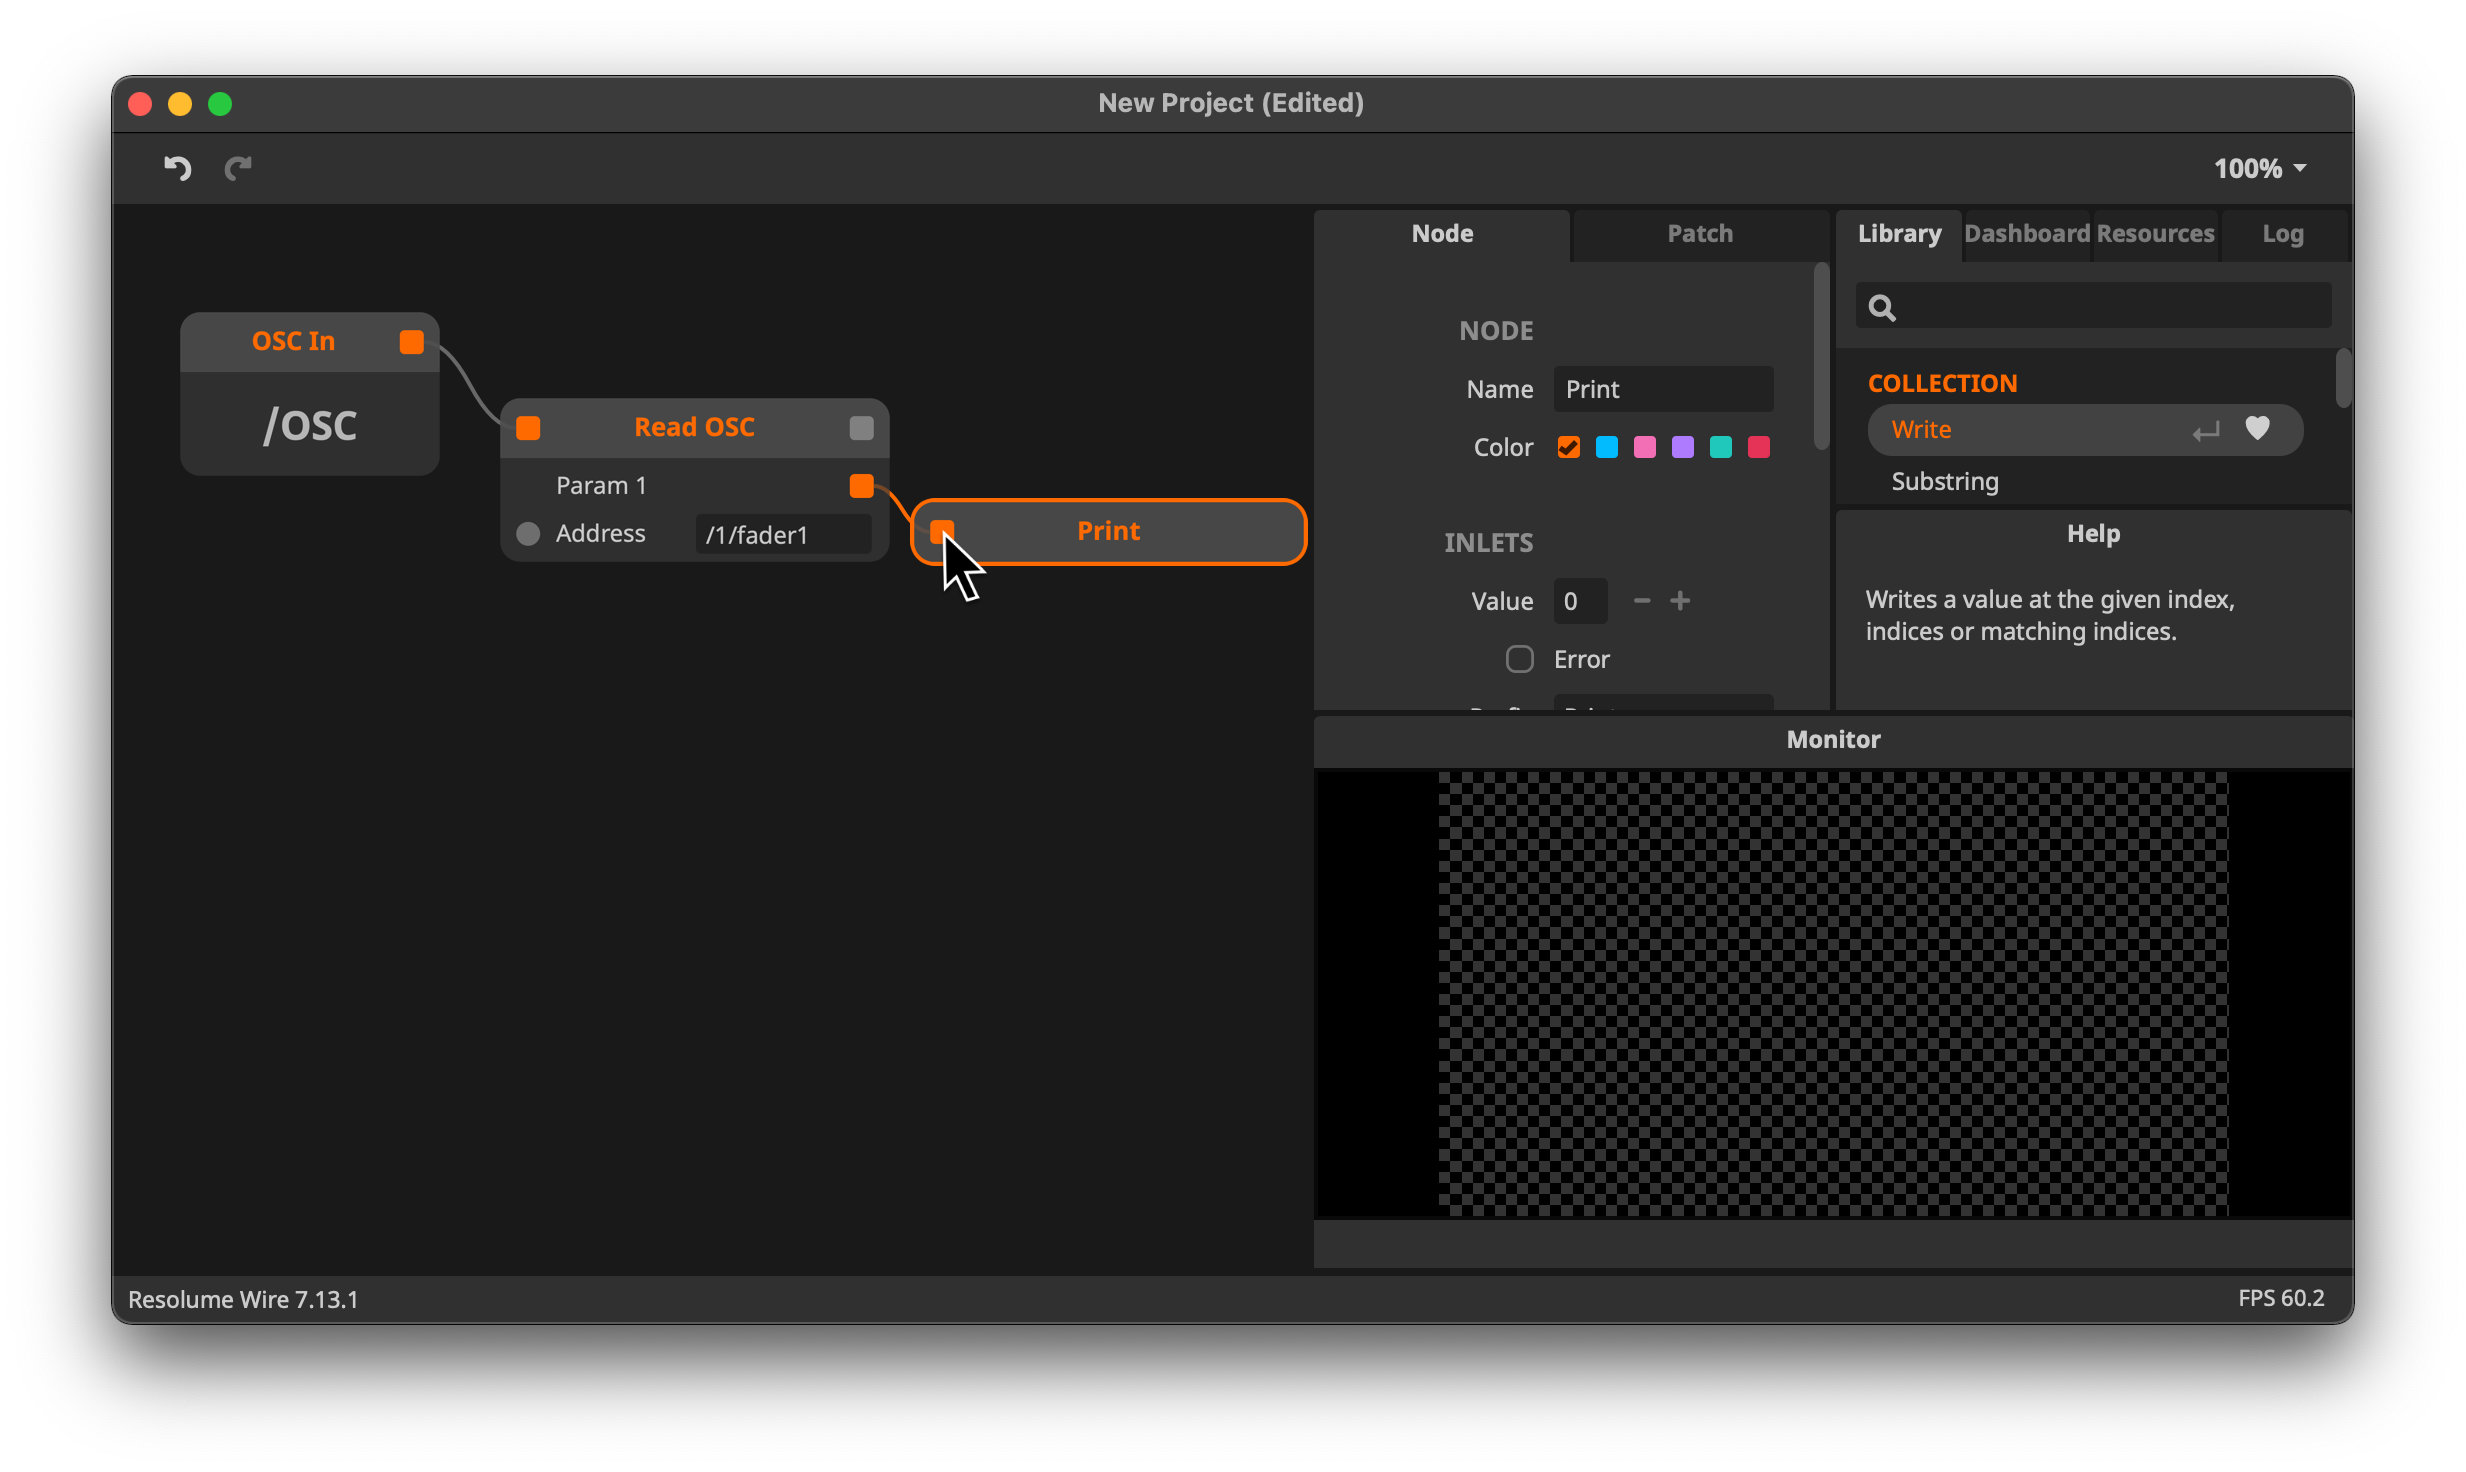
With this setup, the value of the first parameter of OSC messages with OSC address /1/fader1 sent to Wire
will be printed to the Log.
If you've opened the Simple Mk2 layout in the previous steps, this will be a floating point value ranging from
0.0 to 1.0.
Print OSC messages
With both the setup in TouchOSC and Wire now complete, let's open the Log view in Wire and confirm that the values are being printed.
The Log view in Wire can be found in the Log tab in the panel to the top right of the window.
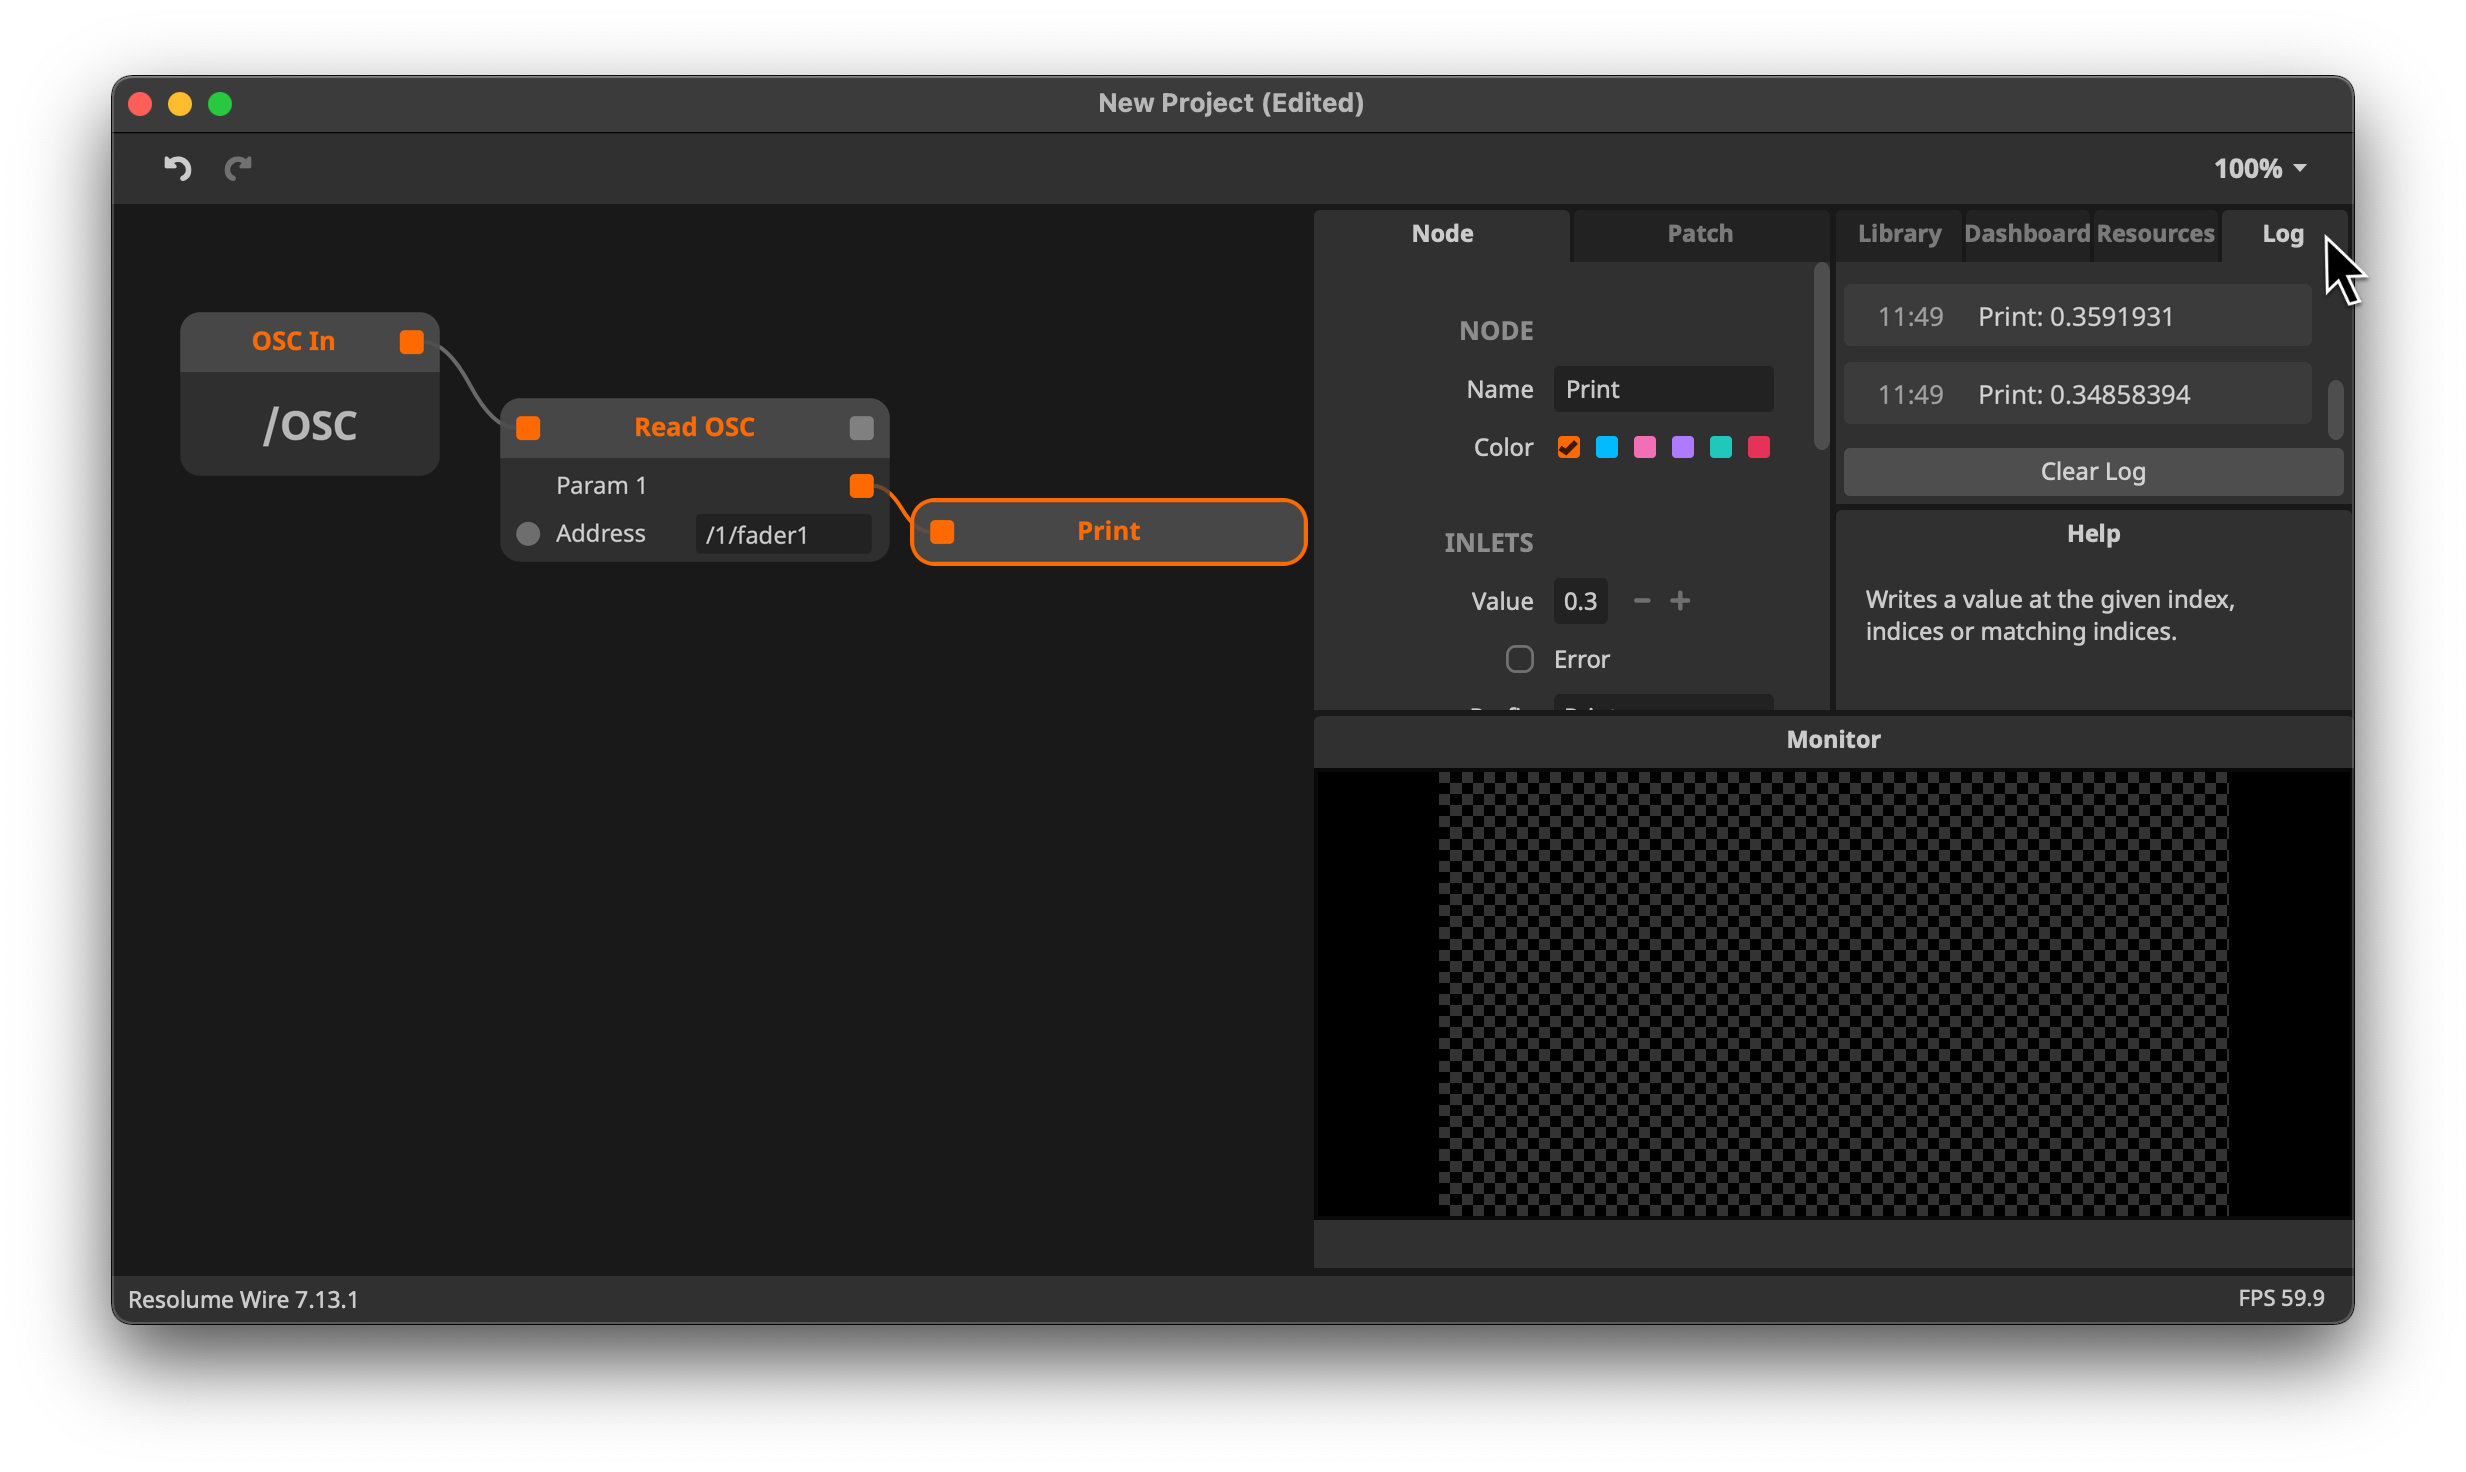
Send OSC messages from TouchOSC by using the fader control pictured below and you should see the received values printed in the Log view in Wire.
Starting with this basic patch, it should be easy to use the values received from TouchOSC in your own compositions and visual effects.
Happy patching!