Setup · Logic Pro
Minimum required versions
- Logic Pro 9.1.2 or higher
Note: Make sure your computer and all mobile devices are on the same wireless network.
Adding TouchOSC as Control Surface in Logic
- Start Logic 9.1.2 or higher.
- Start TouchOSC and configure an OSC Connection as follows:
- Enable a connection and set Type to UDP.
- Click the Browse button and select the name of the computer running Logic. The Host and Send Port fields should now be filled in.
- Enter a port number in the Receive Port field (ie 7000).
- Set the Zeroconf option to LogicPad or LogicTouch, depending on which of these two layouts you plan to use.
- Click Done to apply the connections settings.
- Logic will display the following alert:
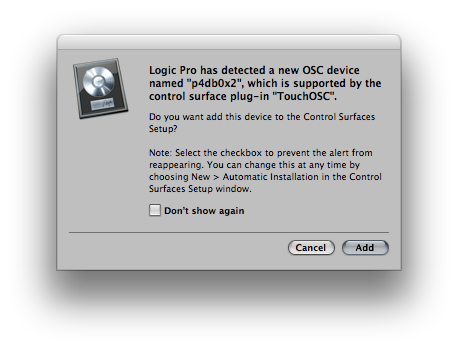
- Click the Add button. Logic will add the device as a control surface and open the Control Surfaces Setup window.
Note: If you share the wireless network with other Logic systems, you may want to select the Don't show again check-box when adding your last TouchOSC device. This will prevent the dialog from appearing whenever other users start their TouchOSC devices. You can reset this alert suppression by re-enabling New > Automatic Installation in the Control Surfaces Setup window.
Note: If the macOS software firewall is enabled, an alert will come up when sending the first OSC message. You will need to confirm the alert so that Logic can communicate with the OSC device.
Note: It is not possible at this time to use customized Layouts or to learn OSC commands. However, authorized 3rd party developers can create Logic CS plug-ins which can use OSC-based communication.