Getting Started · MIDI
In this short tutorial, we will be setting up the sending of MIDI messages from TouchOSC to another application on the network.
We'll be using the TouchOSC Bridge utility application, to handle sending MIDI messages over the network, as this is a common use-case for control surfaces running on mobile touch-screen devices.
If you want to send MIDI messages between TouchOSC and other applications or ports on the same device or computer, the set-up becomes much more straight forward, and you can skip the steps involving TouchOSC Bridge in this tutorial.
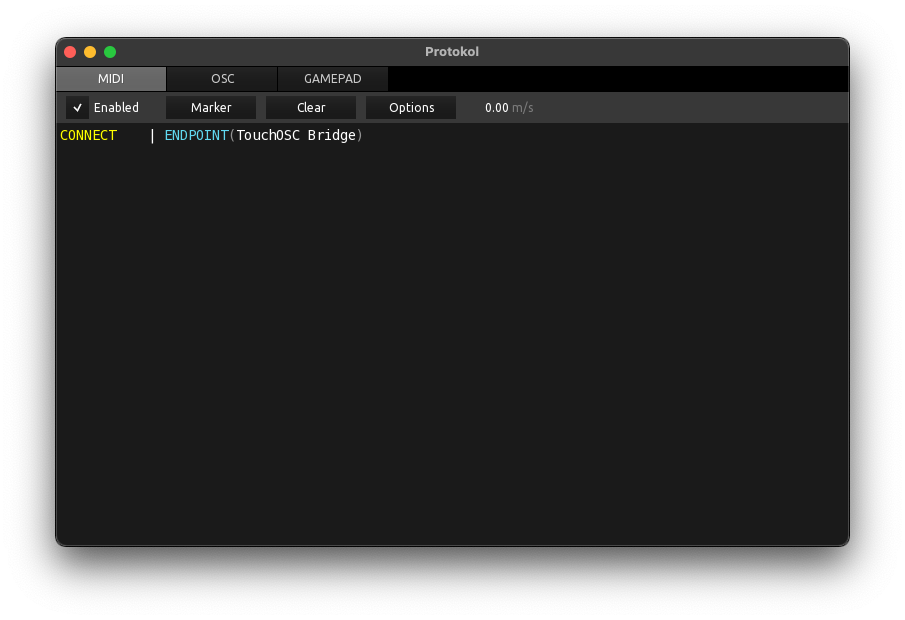
Protokol
We'll be using the Protokol application, our free tool for testing OSC and MIDI connections and messages. This is the same utility we use in-house for testing our applications.
Protokol is available for all the same platforms as TouchOSC and is a free download.
- Download and install any version of Protokol
- Launch the application, switch to the MIDI tab page, and check the checkbox next to Enabled
- Protokol is now waiting for incoming MIDI messages on all available MIDI ports
TouchOSC Bridge
- Download and install TouchOSC Bridge
- Launch the application, a small icon will appear in the menu bar on macOS, or the task tray on Windows
- Protokol should now display the connection of the new MIDI port created by TouchOSC Bridge
TouchOSC
Next we'll configure TouchOSC to send MIDI messages to TouchOSC Bridge and load one of the included example layouts.
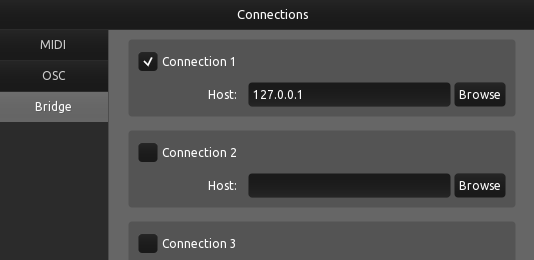
- Launch TouchOSC and open the Connections configuration by pressing the button with the chain link icon on the editor toolbar
- Switch to the Bridge tab page
- Enable the checkbox next to Connection 1 and use the Browse button to select the name of the host or device where you launched TouchOSC Bridge
- The Host field should now be filled in
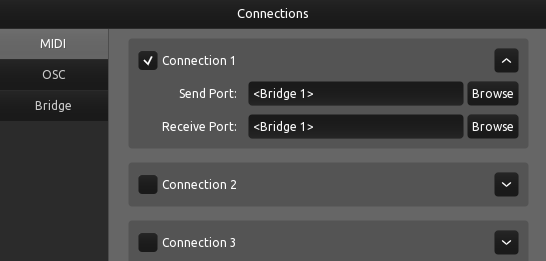
- Switch to the MIDI tab page
- Enable the checkbox next to Connection 1 and use the Browse buttons to select <Bridge 1> for both the Send Port and Receive Port fields.
Now we'll load one of TouchOSC's included example layouts.
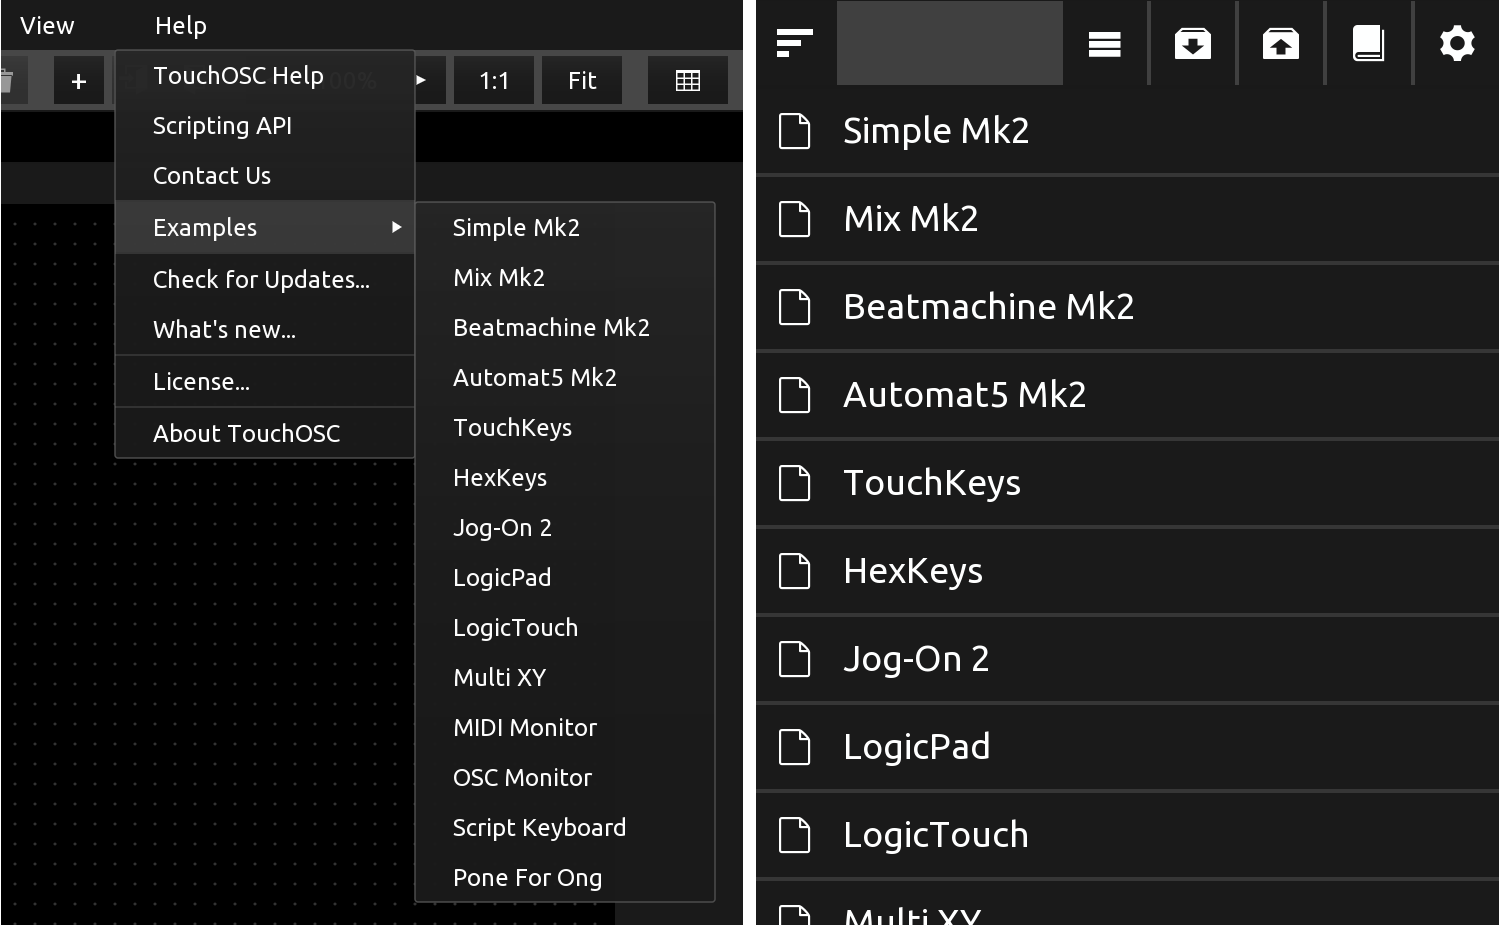
- Open the list of included example layouts, depending on your operating system:
- For the desktop version, find the menu at Help > Examples
- For the mobile version, find the example browser at the top of the editor panel on the right, and press the button with the book icon
- Select any one of the first four documents with Mk2 in the name
With the document now loaded, and the connection configured, put TouchOSC into control surface mode by pressing the play button on the editor toolbar, or by using the CTRL/CMD+E keyboard shortcut on desktop platforms.
Send MIDI messages
With both the receiver and sender configured and ready to go, we'll send some MIDI messages.
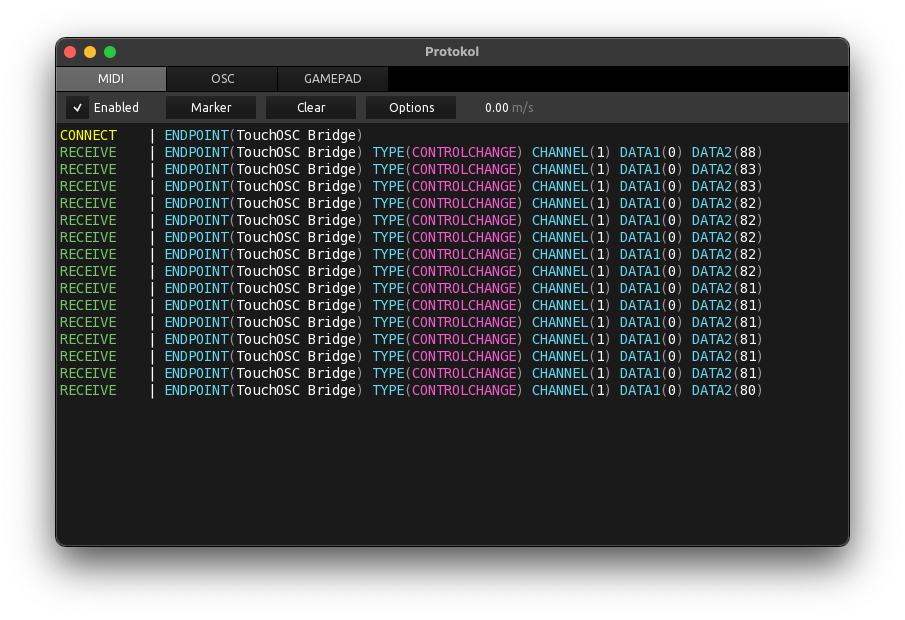
Move a fader, press a button or interact with any other control on the control surface in TouchOSC and you should see the received MIDI messages being printed in Protokol.