Editor · Interface
The main interface of TouchOSC can be in one of two modes, Editor and Control Surface mode.
Switch to control surface mode by pressing the play button in the editor Toolbar, and the circle icon button in the control surface to switch back. On desktop platforms the CTRL/CMD+E keyboard shortcut can be used to toggle between both modes.
The position of the circle button in the control surface can be configured in the preferences.
Control Surface Editor
The main control surface editing area is where most editing actions take places.
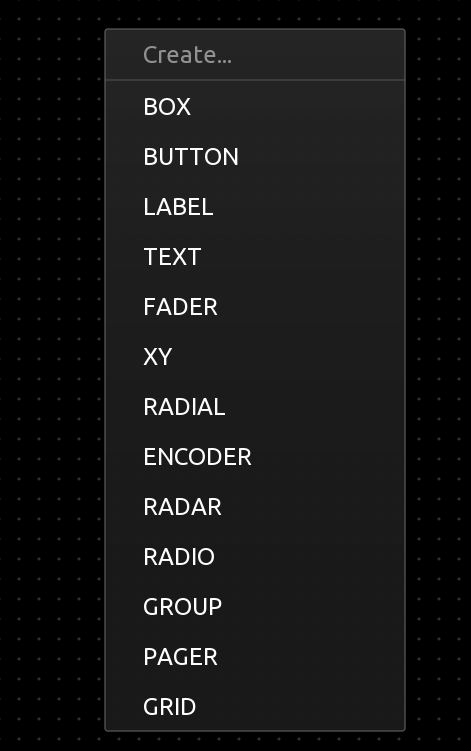
Right-clicking on an empty area of the document (or long-pressing on mobile platforms) will bring up the Create context menu for adding new controls.
Controls can be selected, either by directly pressing on a control's frame or using a lasso selection by pressing and dragging from an empty area of the document. With controls selected, the panel on the right will display context-sensitive information and properties depending on the type of selection and number of selected controls.
When resizing controls using the handles placed around the edges of the control's frame, on desktop platforms the following modifier keys can be held down to restrict the re-sizing behavior:
- SHIFT - Resize with original aspect-ratio locked
- CONTROL - Resize around the center point of the control
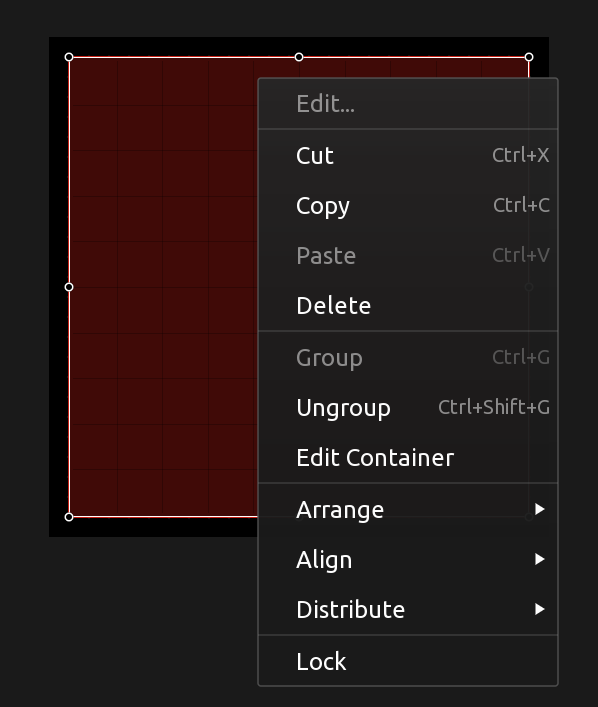
Right-clicking on the selection (or long-pressing on mobile platforms) will bring up the Edit context menu.
When a control is locked, it cannot be selected. A locked control can be unlocked using the document tree view.
Some types of controls are containers for other controls, selecting Edit container from the Edit context menu will descend into the container and display the contents for editing.
To exit editing a container, use the additional Exit container menu item of the Create menu, or double-click outside of the container's frame bounds in the editor.
Panel
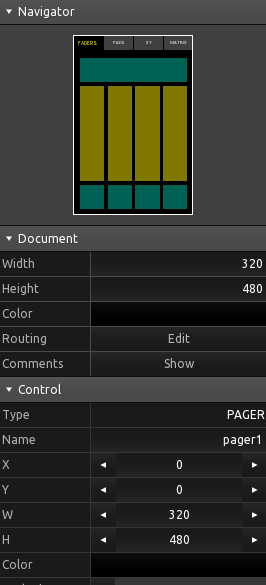
The editor panel on the right will display a navigator view of the whole document, the document properties, a hierarchical document tree view of all controls, and, if any controls are currently selected, the control properties, values and messages of the current selection.
All sections of the editor panel can be collapsed and expanded using the section header bar.
On mobile platforms, the top of the panel holds an additional toolbar with functions that would usually be found in the window menu on desktop platforms.

From left to right, the functions are as follows:
- Toggle the editor panel
- Toggle the log view
- Open the message mapping dialog
- Open the font viewer
- Save document
- Open document
- Open an included example layout
- Application preferences and about screen
Toolbar
The editor toolbar holds buttons and menus for various control surface editor functions.

From left to right, the functions are as follows:
- Undo
- Redo
- Copy selection
- Paste clipboard contents
- Delete selection
- Add control
- Edit container - With an editable container control type selected, this function becomes available to edit the container contents.
- Exit container - When editing the contents of an editable container control type, this function becomes available to exit the current container and ascend one level in the document hierarchy.
- Zoom step and numeric input
- Zoom to 1:1
- Zoom to Fit
- Grid, snap and rulers menu
- Switch to control surface view
- Connections configuration
- Editor Network configuration
Log View
The log view provides a way for various systems of the application to print information about the internal state. This can be helpful when troubleshooting problems or for confirming that configured connections or scripts are working correctly.
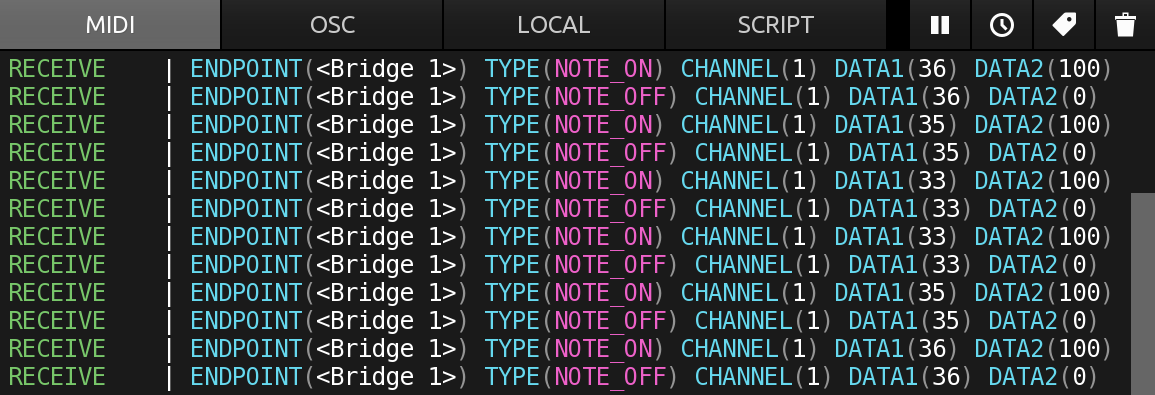
The log view will display:
- MIDI/OSC: Received and sent MIDI and OSC messages
- LOCAL: Values transmitted using local messages
- GAMEPAD: Received inputs from connected game controllers
- SCRIPT: Script errors and calls to the script
printfunction
The additional buttons in the top right provide the following functions, from left to right:
- Pause the logging of messages
- Display a timestamp for messages
- Insert a marker into the log
- Clear the log
On desktop platforms, it is possible to open the log view in a separate window using an option in the preferences.
Message Mapping
The Message Mapping dialog displays a sortable table of all MIDI, OSC, LOCAL and GAMEPAD messages configured for the current document.
Messages can be sorted by each column in the table by clicking/tapping on the table header and exported to a comma-separated format (CSV) using the Export button.
Double-clicking or tapping any row in the table will close the dialog and select the control that the message is owned by in the control surface editor view.
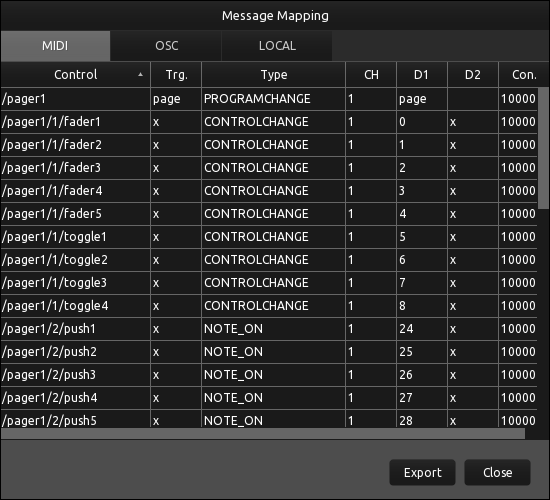
The columns for each type of message are as follows:
- MIDI
- Control - The control the message is configured for
- Trg. - The value object(s) that will trigger the sending of the message
- Type - The type of the MIDI message
- CH - The channel of the MIDI message
- D1 - The value of the first data byte of the MIDI message
- D2 - The value of the second data byte of the MIDI message (if any)
- Con. - The connections the message is configured to be sent/received on (left to right from first to last connection, 1=enabled, 0=disabled)
- OSC
- Control - The control the message is configured for
- Trg. - The value object(s) that will trigger the sending of the message
- Address - The OSC address of the message
- Arguments - The arguments of the message
- Con. - The connections the message is configured to be sent/received on (left to right from first to last connection, 1=enabled, 0=disabled)
- LOCAL
- Control - The control the message is configured for
- Trg. - The value object(s) that will trigger the sending of the message
- ⊙→ - The source variable of the message
- Target - The target control of the message
- →⊙ - The target variable of the message
- GAMEPAD
- Control - The control the message is configured for
- Input - The game controller input that will trigger the message
- Target - The target value or property of the message
- Con. - The connections the message is configured to be received on (left to right from first to last connection, 1=enabled, 0=disabled)
Font Viewer
The Font Viewer provides a way to browse all characters of the typefaces included with the application.
The application embeds a number of fonts available in all versions for all platforms, to guarantee that any document shared between operating systems and platforms will be rendered exactly the same - without errors or missing symbols.
At the top there is a choice of two styles of typefaces, Default and Monospaced, analogous to the font property of TouchOSC's Label and Text controls.
Clicking or tapping any character in the font viewer will copy that character to the clipboard.
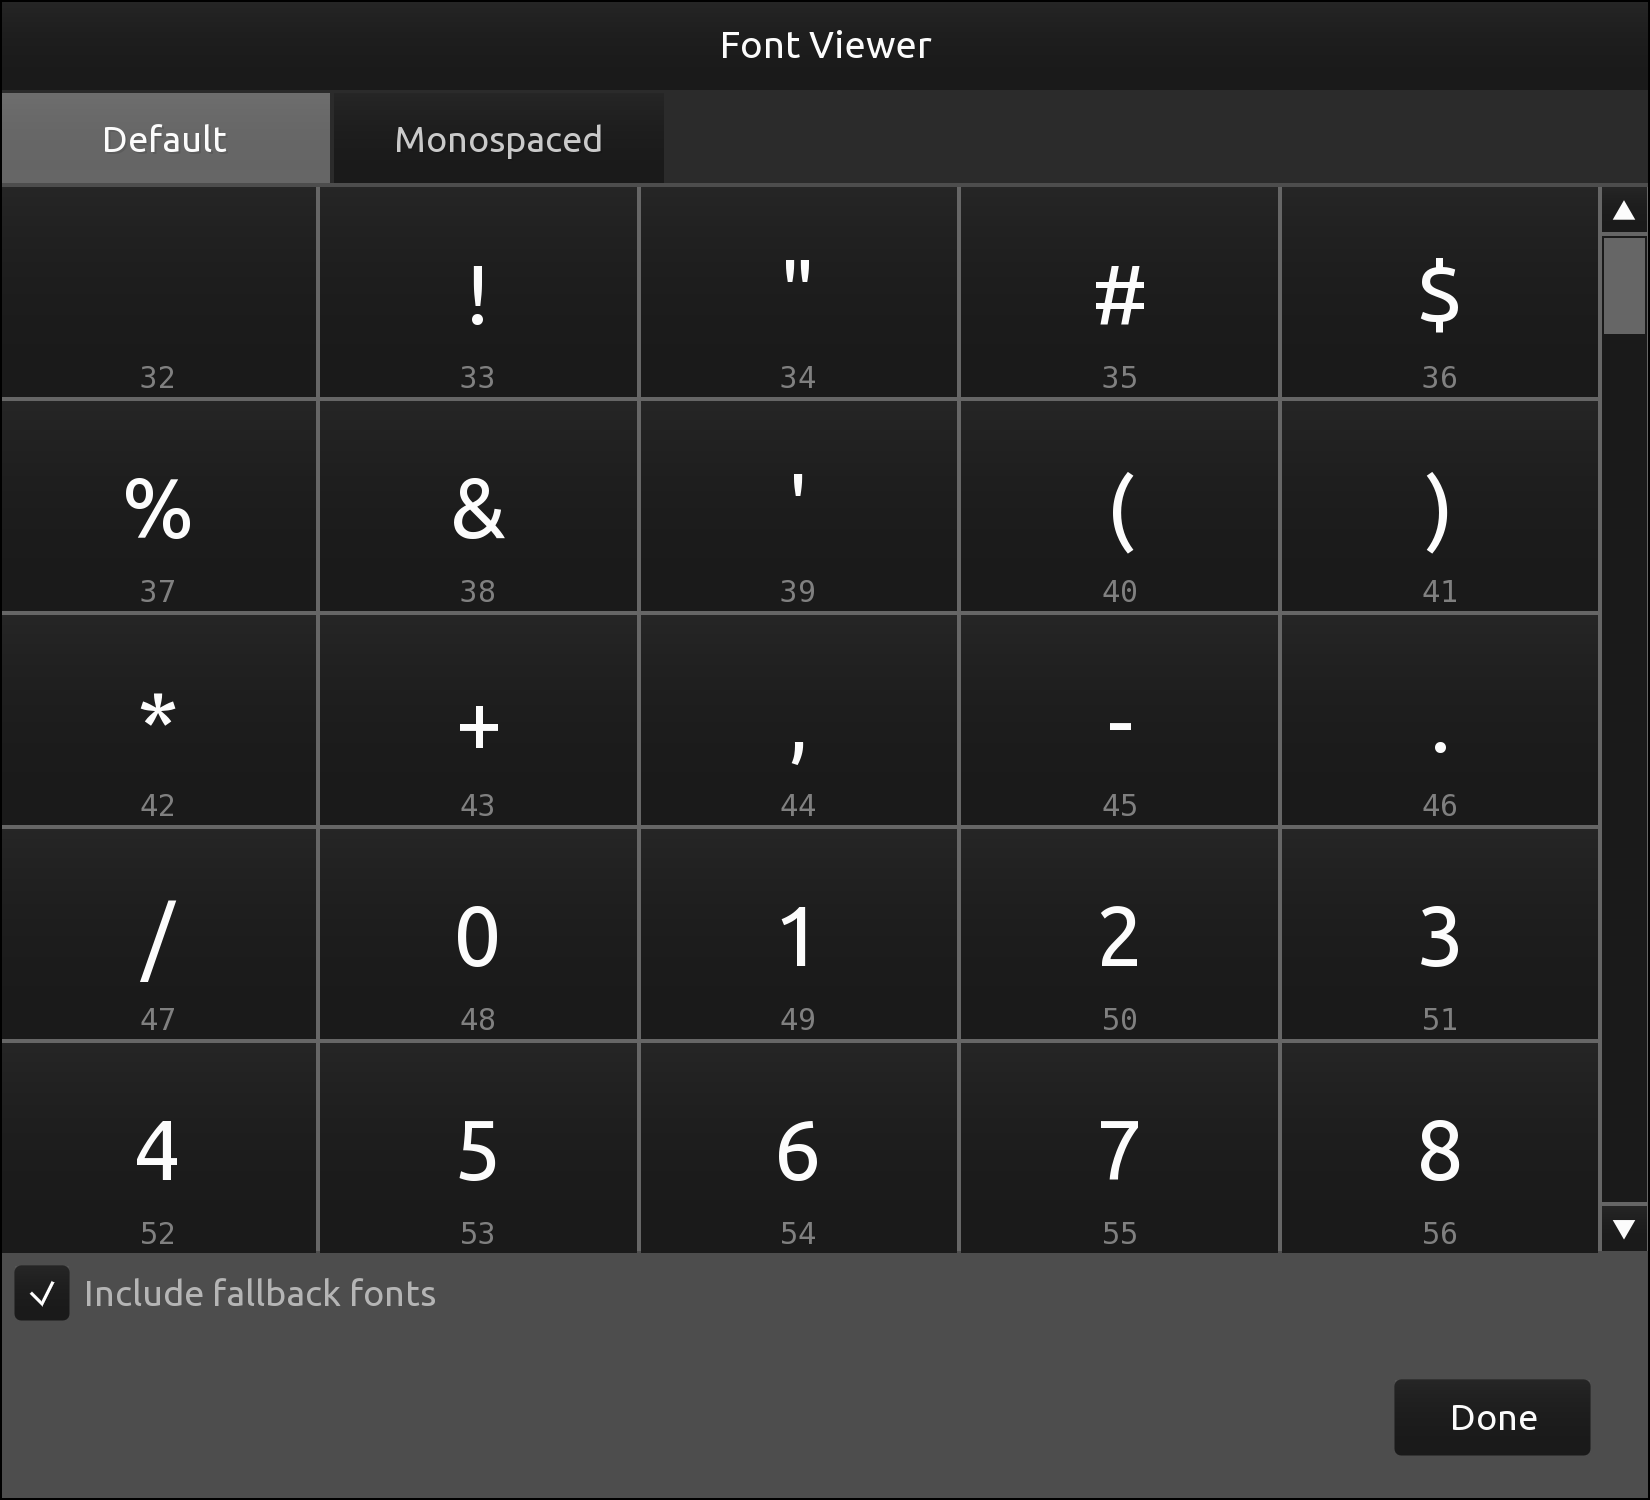
When rendering any character, TouchOSC will search a series of fallback typefaces:
- Default
- Monospaced
Unchecking the Include fallback fonts option will limit the display of characters to the first font in the fallback chain only.