OSC with PureData
PLEASE NOTE
You only need to follow this guide if you are looking to use and learn more about TouchOSC's more advanced Open Sound Control functionality.
If you are simply looking to connect TouchOSC to any MIDI capable software please refer to:
MIDI with TouchOSC Bridge.
Configure Pure Data
Now we'll setup the free and open-source application Pure Data to receive and send OSC messages from and to TouchOSC.
Please note that any kind of firewall or security software running on your computer can be an absolute show-stopper when it comes to network communications, so if you have no success with the following steps, please try to disable those kind of applications temporarily and try again.
- First browse to the Pure Data website and download and install pd-extended for your operating system.
- Download the PureData file, basic.pd, and open it with the PureData application. You should be presented with the following window:
Sending OSC messages
PureData is now ready to receive OSC messages from TouchOSC. If you look at the image, in the left part you'll see a box with the text dumpOSC 8000. This is a PureData object that listens for OSC messages on port number 8000. We'll now setup TouchOSC to send some OSC messages to this object.
- Make sure both your computer running PureData and your device with TouchOSC installed are connected to the same wireless network
- Start TouchOSC on your device
- Select the row in the Layout section, and on the following screen select the row titled Simple
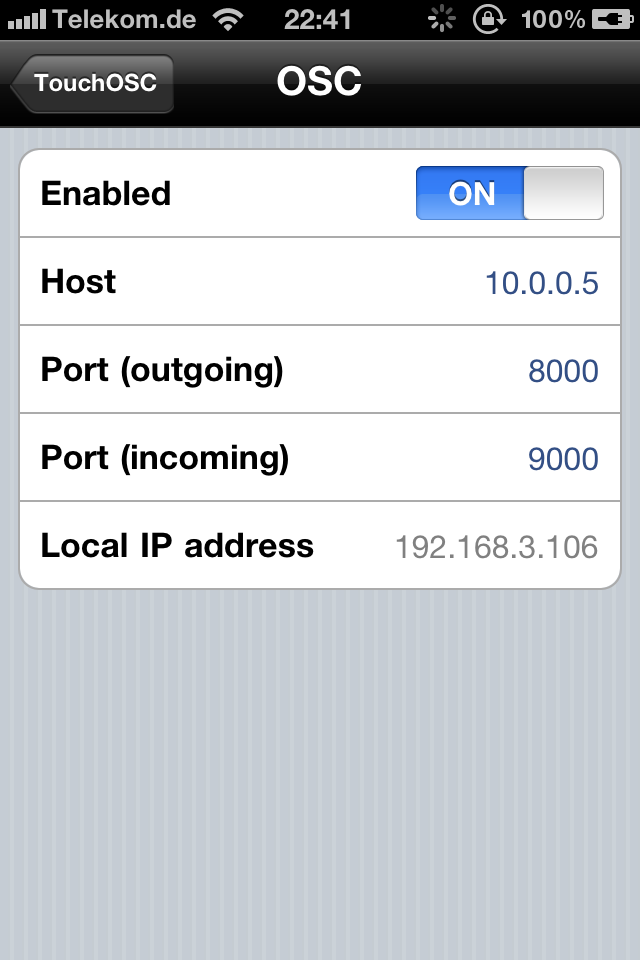
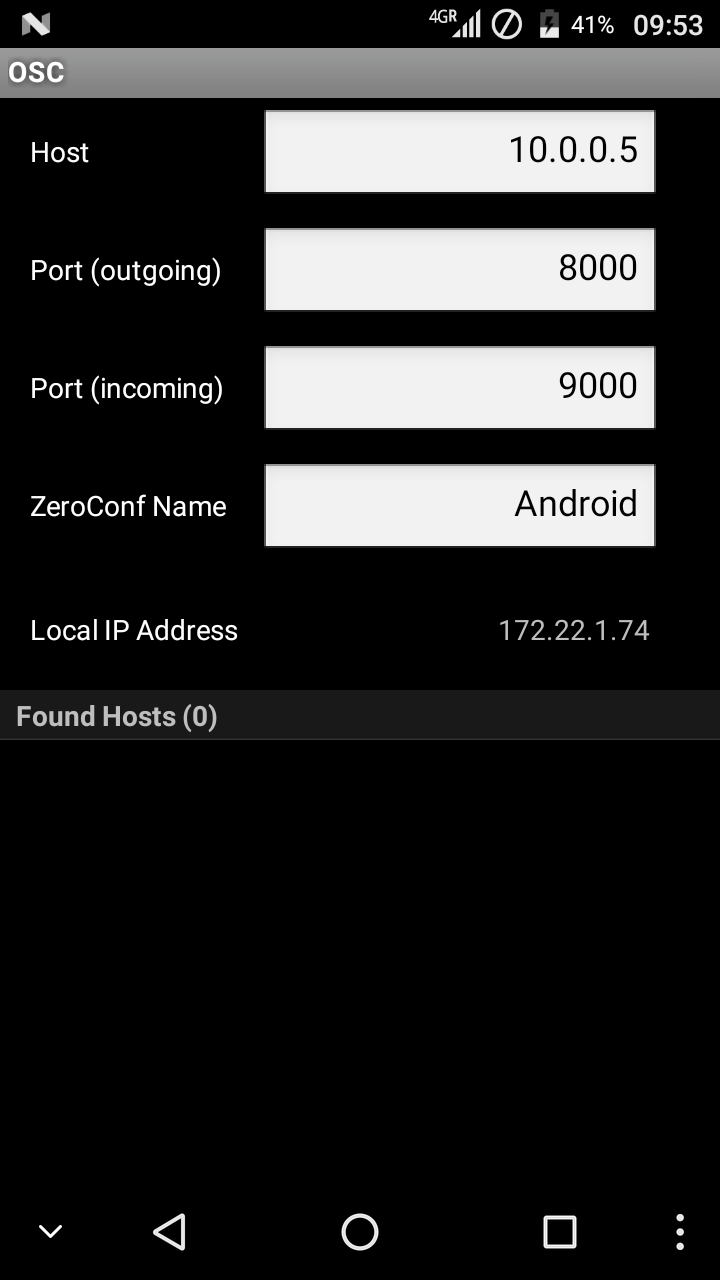
- Now selected the row in the Connections section starting with OSC:. You should see the screen pictured to the right
- You now need to enter the IP address of your computer in the Host field on this screen. Please refer to the recipes in the Appendix as to how to find your computer's IP address
- In the Port (outgoing) field enter 8000
- In the Port (incoming) field enter 9000
- Write down the IP address that is displayed in the last row on this screen. We'll need it later
- Go back to TouchOSC's main configuration screen and press the blue Done button
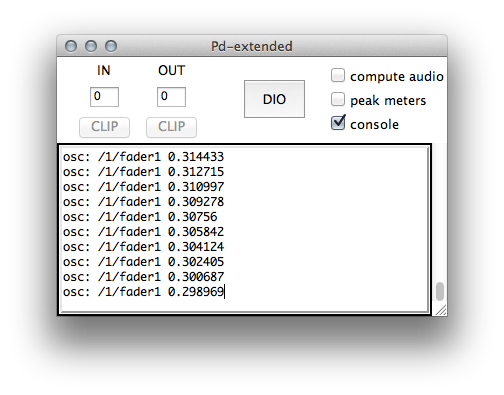
- If all went well you should now be presented with TouchOSC's control surface view, and when using any of the controls on screen, PureData's console window should react by printing out all the messages it is receiving from TouchOSC

Receiving OSC messages
To send OSC messages from PureData to TouchOSC, we need to tell PureData where to send those messages to on the network, just as we told TouchOSC the IP address of where to find your computer.
- Select the PureData window that is displaying the dumpOSC object and the rest of the structure of the PureData file
- From PureData's menu select Edit > Edit Mode. The PureData file is now editable and can be modified
- In the structure click on the box that displays connect 10.10.10.10 9000 and replace the 10.10.10.10 with the IP address you noted earlier when on TouchOSC's OSC configuration screen
- Leave the Edit mode by selecting Edit > Edit Mode from PureData's menu again
- Click on the connect object you just edited again. This will prompt PureData to connect to the IP address you entered on port 9000, which is what we set up TouchOSC to listen for incoming OSC messages on
- Click on the box that displays send /1/fader1 1 and if all went well the first fader on the first page of TouchOSC's control surface view should jump
Summary
If you successfully set up both connections described on this page then you have working bi-directional communications between PureData running on your computer and TouchOSC running on your iPhone/iPod touch/iPad. Congratulations and welcome to the future!
This quick-start tutorial was meant to get you started without reading all of the information in the following chapters and the information here is highly compressed so don't worry if you didn't understand everything that is happening here. Please read on for a more detailed description of how to set up TouchOSC and its feature set.


